
Vertical Board & Batten


This entire room came together with about $90 in materials and completely transformed the look of this cookie cutter blank slate into a traditional look of my dreams! If you’ve ever wanted to add character to a space but felt intimidated by cost or skill level, this is one of my favorite budget-friendly, beginner-friendly projects to start with.
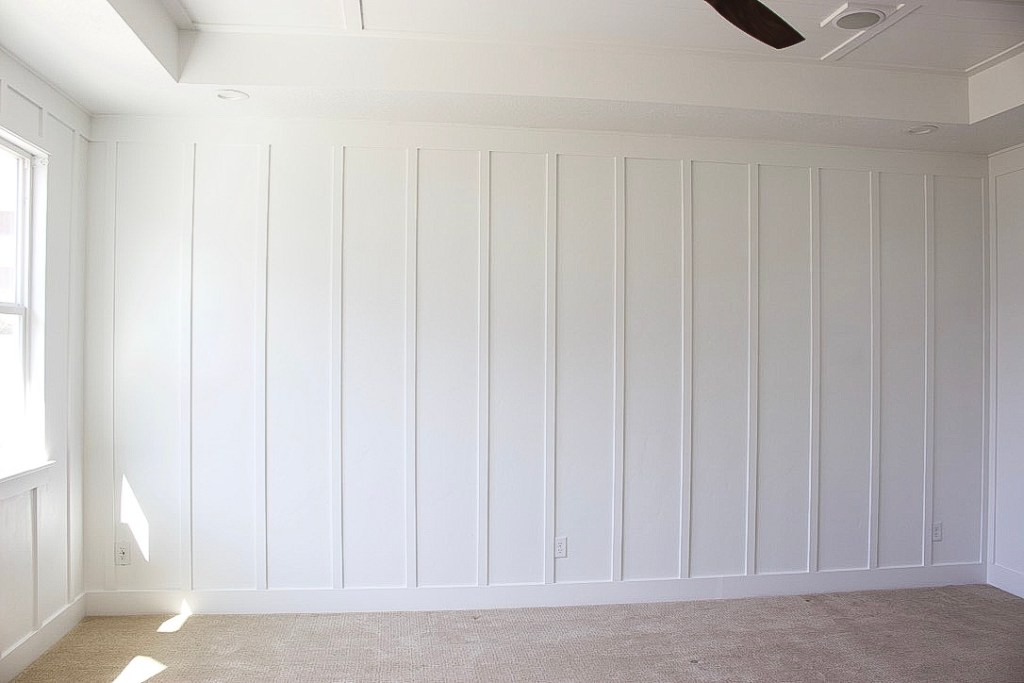
An interior batten siding style accent wall adds depth, texture, and visual interest without removing drywall, doing any major construction, or committing to something permanent. It gives you that “custom” look using simple trim boards and basic tools.
Then to see the full design plans for this masted bedroom click here.
This post does contain affiliate links in which I will be compensated a small amount if you purchase through the link at no additional cost to you. Thank you for supporting Honey Built Home.
Why this project is so beginner friendly?
There’s very little tools involved in this project! Especially if you have your wood cut down at Home Depot or Lowes.
Floor to ceiling board and batten can also make a room feel so much taller and grander.
The spacing on this project isn’t set in stone. Because you are going around the entire room, you can manipulate moving a batten strips to the left or right an inch or two and no one will ever notice!
Materials
1×3″ boards (if you aren’t ripping down MDF)
1×5″ boards
1×2″ boards
2″ finishing nails
caulk
wood filler
primer
paint
120 grit sand paper for orbital sander
220 sanding block
tack cloth
tape & plastic
carpet protector

Tip: There are a few different types of wood you can use to create this look. unfinished MDF, solid pine (or another solid wood), or primed MDF trim. Each has their pros and cons. For this project I selected unfinished MDF as it was most inexpensive, but it is also the most labor intensive. I had Home Depot cut down a 4×8 sheet of MDF into 2″ strips x 8′ long, as well as some 5″ strips. I was able to complete my 18’x14′ bedroom (all 4 walls) with 3 sheets of MDF ($90). HOWEVER, each plank had to be sanded on both sides and primed well. This added a lot more labor hours, but if budget is #1 priority, it’s definitely the least expensive route. Using primed MDF trim would have cost around $250, but saved significantly on time.


Tools:
Miter Saw or Circular Saw
Finishing Nail Gun
Orbital Sander
Level
Stud Finder
Tape Measurer
Measure and plan
This is truly the most crucial step in the board and batten process. First I went around the entire room with a stud finder and marking the wall. Studs are typically 16″ apart (from the center of one stud to the center of the next stud). Lining up the board and batten planks with studs secures the board into the wall and eliminates the need for any type of glue or liquid nails. If you find yourself in a spot where you don’t have a stud you can also insert two nails at an angle so they cross each other inside the wall. This locks the nails together and holds the board in place.
Electrical outlets: a common mistake is if a plank falls on an electrical outlet many will take a saw and cut out a notch for the outlet. It looks more professional to move the plank to the side of an outlet even if that means your spacing is off 1/2-1″. The eye will never notice it and your DIY skills will look like a professional did the install.
Completing a project like this can sometimes feel overwhelming. If you need help learning the basics of not only tools, but how to cut wood accurately, caulk, finish paint like a professional. Check out, DIY Beginner Basics, you can go at your pace with my online course that teaches you how to DIY. Head on over to www.homeschoolwithtools.com and use code HONEYBUILT10 for $10 off.

Create a Spacer
I chose to go with a 2″ board and batten plank so I created a 14″ spacer out of scrap wood to help with the install. With the spacer I can install one plank. Put the spacer up, align the 2nd plank, check level, then install rather than using a tape measurer and marking each time.

Install Vertical planks
Using a spacer, level, and finish nailer install all of the vertical planks. I have 9′ ceilings so all of my planks are 8′ in height and rest on top of my 5″ baseboard.


Install Top Trim
Place a 1×5″ trim on top of the vertical planks and nail into studs. Top the 1×5″ with a 1×2″. You could also add crown molding for a more traditional look.
Finish
Fill the 700 nail holes with plastic wood filler and caulk all of the seams between the wall and wood. Any seam from wood to wood transition fill with wood filler and sand down with 120 grit sand paper. If using solid wood, use a 220 grit sand paper to prevent from losing the straight edge of the wood. Using a lower grit will round the edges of the wood.


Prime the walls. Since I used unfinished MDF I needed to prime the wood very well. MDF tends to suck up paint so I sprayed Zinsser primer on all of the walls & wood trim. Here is my favorite, budget friendly paint sprayer. The walls are Sherwin Williams Extra White which is a crisp clean white. But this style would also look fantastic in a dark color


Why This Interior Accent Wall Makes Such a Big Impact
-
Adds depth and visual interest to an otherwise flat wall with inexpensive trim pieces.
-
Makes the room feel finished and intentional
-
Works with a classic design, modern farmhouse, or as a subtle contemporary accent
-
Easy to replicate in another room
It’s proof that you don’t need to redo an entire room to completely change how it feels.
Don’t forget to head on over to my online course, DIY Beginner Basics, where I will teach you, and walk you through all you need to know to start DIYing. Use code: HONEYBUILT10 for $10 off.


