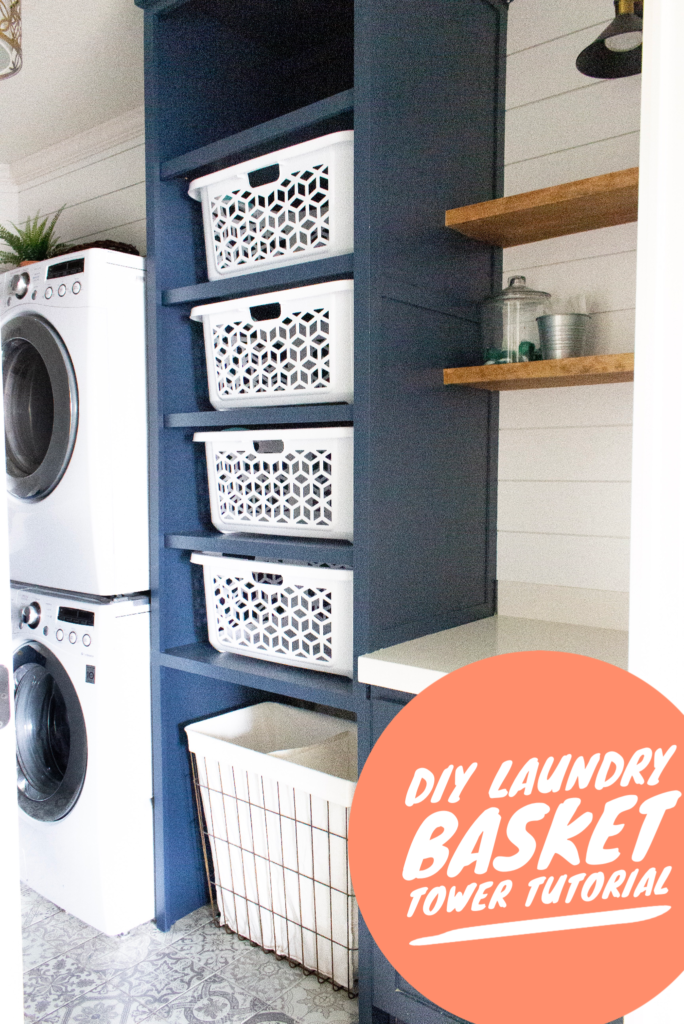
In my house, the laundry is never ending, stacked high, and piles everywhere. I NEEDED a place that I could put all the laundry baskets, and lots of them! Let me show you how I did it.


Materials Needed for Laundry Basket Tutorial:
x2 4×8’ sheets of 3/4” Birch Plywood
x1 4×8’ sheet 1/2” MDF Plywood
x7 Select Pine 1×2”
x1 Select Pine 1×4”
x2 packages of shelf pins
1/4″ drill bit

Cut List for Laundry Baskets:
3x 22” x 32” Birch (top, bottom, and middle pieces)
2x 22” x 31.25” Birch (sides of bottom box)
2x 22” x 72” Birch (sides of top box)
4x 20” x 30.5” MDF (shelves)
1x 32” x 72” 1/4” Underlayment (backing of cabinet)

Assembly of Bottom Box:

Set your Kreg jig to 3/4 (the thickness of your plywood) and your drill nut to 3/4” (follow directions that accompany the Kreg jig tool).
Drill 3 pocket holes onto the the inside sides of the bottom box with Kreg jig

Use wood glue and 1 1/4” pocket screws and attach the sides to the top.

You will have 3/4 of a box at this point. Here’s the red 90 degree clamp.

*i chose to not do a bottom and have it be exposed tile floor so the hamper would easily slide in and out. I also chose to not do a backing to this cabinet so there would be easier access to the water shut off located behind it.


2x scrap wood at 31.5” x2-3” with 2 pocket holes on each end. Screw these on the inside of the cabinet as a support brace
FACE FRAME BOTTOM CABINET


Top face frame is made from a 32” 1×2” of select pine. Set this aside and assemble as part of the assemble of the two boxes. This will overhang on the top so it covers the plywood on each box.
Cut 2x 31.25” 1×2” select pine boards and attach onto cabinet with wood glue and 1 1/4” finishing nails. The lip of the select pine board will be on the inside opening of the cabinet box.
Set aside and start to assemble your top box.
Top Box


Drill 3 pocket holes on the top and 3 pocket holes on the bottom sides.

These should drill into the top and bottom boards with 1 1/4” pocket screws and wood glue.

2x scrap wood at 31.5” x2-3” with 2 pocket holes on each end. Screw these on the inside of the cabinet as a support brace

Attach 1/4″ underlayment backing with wood glue and finishing nails.

Face Frame


32” select pine 1×4” to the top cut at 45 degree angle (measuring from inside short end of angle to short end of angle).
Measure from wall to front of cabinet and this is the length for the side 1×4” Top trim.

Select Pine 1×2” glued and attached with finishing nails directly underneath the 1×4” select pine.
Select pine sides the length from the top 1×2 until the side meets the bottom piece of plywood. Leave a gap for the top trim piece you cut for the bottom cabinet.
Side Trim/Making it look custom and built it:
For my project just due to the size and space I had to assemble the two cabinet pieces in the room. I had primed and painted them with a sprayer, but in the end to create a custom look I had to secure it to the wall of the laundry room, trim around it and paint it again in the laundry room.
The problems I ran into and the solutions:
Due to the water lines and the bulky electrical outlet the cabinet could not sit flush against the wall. Originally I had sized the cabinet so it would be recessed from the cabinet next to it by a couple of inches. When I discovered that it couldn’t sit flush to the wall I decided to make it flush with the cabinet next to it and shim the back.


I used 2 pieces of scrap shiplap and secured them to the wall’s studs behind where the cabinet will sit. I then screwed the brace board of the upper cabinet to the wall/scrap shiplap.
This caused a 1” gap along the sides of the cabinet and the wall. To fill this gap I took 2” lattice trim and placed it flush to the wall and secured it into the cabinet with brad nails.
To add some interest I added lattice to the front side of the cabinet and a decorative piece horizontally in the middle as well as a “hide the gap” piece on the bottom side where the cabinet touches the quartz countertop.
Due to our attic opening running into the top trim I secured the 1×4” select pine so it was touching the attic opening trim. I then took a piece of 1×2″ select pine on its side and let it overhang the cabinet by 1”. I secured this 1×2 into the ceiling.

I taped all of these wood pieces off, primed them, and then painted them with a foam roller to lessen the chances of brush strokes.

Shelves were cut to fit and a 1×2” piece of select pine was brad nailed and glued to the front edge.


These shelves were then sanded with 120 grit followed by 220 grit and wiped off with tack cloth before they were primed and painted.

Shelf pins were 13.5” apart and drilled with a corresponding 1/4” drill bit (the same size as the pin).
There is a highlight bubble on my instagram that has videos of the whole process if you have questions those might be able to answer them.

Check out my other post on mylaundry room makeover, and my laundry room.
For more projects and tips, follow along on Instagram @honeybuilthome


+ show Comments
- Hide Comments
add a comment