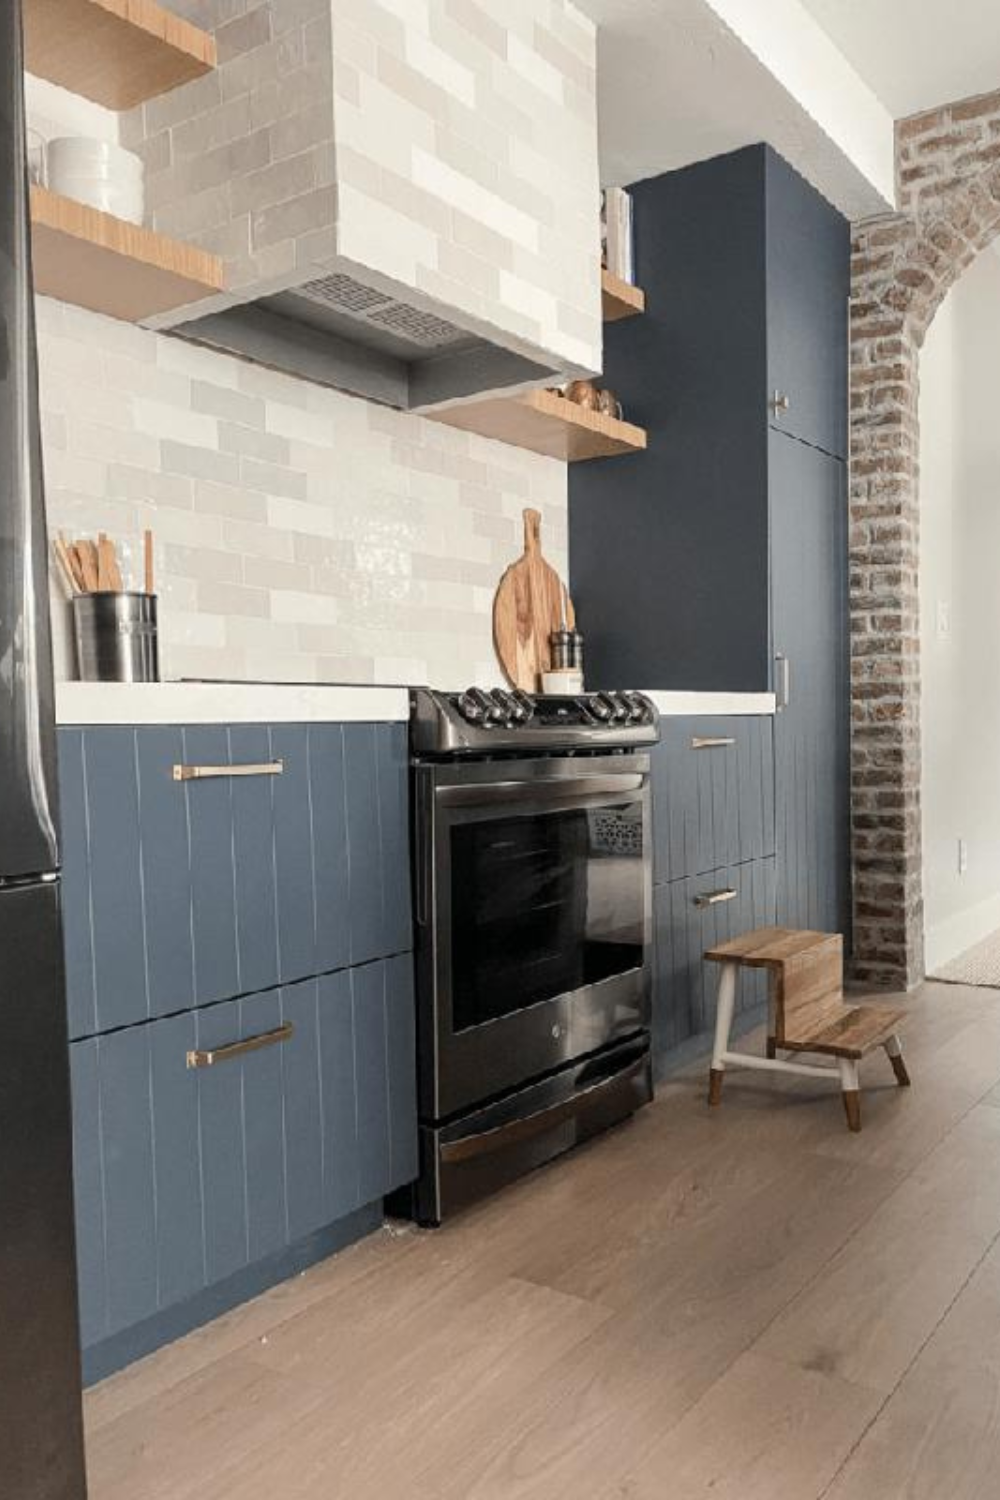
It’s actually finished. I could cry all the happy tears because what I envisioned when I mocked up the basement has come to fruition tenfold better than I had originally planned. Click here to read all about the basement plan and here for the full budget breakdown for the kitchen. In the last 6 months from scratch this basement kitchen was built and I’m so excited to share it with you!
Construction Timeline
I think its important to note before we jump into the reveal, how this kitchen didn’t happen overnight. It was a series of smaller projects combined to make a cohesive and functional space. Note this timeline isn’t multiple contractors or DIYers working 8-12 hour days 5 days a week. This is a combination of full-time contractors + myself (a DIYer / full-time mom of 3 / and basketball coaches wife) and occasionally my husband tackling projects in-between real life.
January 1st: Planning. I used the app Room Planner + IKEA kitchen planner to map out the space. Cabinet box ordering, sink and appliances selected as well as exact positioning for light switches, can lights, plumbing fixtures (basically everything that goes inside of the walls had to be planned at this stage).

January 9: Framing, Electrical, Plumbing, HVAC. These four took approximately a week fo complete for the entire 1000 sq. ft (living room + kitchen space). Two contractors focused on the framing, electrical and plumbing, and we subcontracted out the HVAC to another company. The two worked in tandem to complete this stage. Hiring it out was the best decision because of the how quickly a crew of professionals can work and maneuver around the difficulties a basement brings (foundation walls, dropdown ceilings).

January 25: Sheetrock. Sheetrock took 2-3 weeks to hand and then mud and tape and texture. We had a mild texture applied to the walls and ceilings.

February 23: Basement was ready for primer and paint. All of the cabinet boxes arrived from IKEA. I waited until I had the boxes installed to order the cabinet doors (you don’t have to wait as IKEA tells you the dimensions of the doors on their website, but I wanted to double check). Sink and faucet arrived and appliances were ordered. Basement painted 50% lightened Modern Grey by SW with SW Extra White trim.

March 5: Brick install took 2 weekends to complete and an additional weekend just for grouting. Total we installed 938 bricks. Full details on how to install brick, how to grout brick, and all of the options click here to read this tutorial: How to Install Thin Brick

March 16: Countertops. We ventured into Chris and Dick’s to select our quartz countertops. Tip: bring your cabinet doors and backsplash (if you already picked those) with you to help narrow down your selection. Here’s a quick video of the whole process from selection to templating, to install of our quartz. Countertops were quickly followed by Carpet install in the hallway and living room.
— pause to wait for cabinet doors to arrive + other projects–
April 9: Luxury Vinyl Plank install & appliances delivered This was one of the quicker DIYs as it truly only took one day to complete. Click here to read all about the flooring we picked and how to install them.
April 22: Counters installed. Contractors come back to hook up plumbing lines to appliances, attached outlets.

April 29: Install cabinet doors/filler pieces & a week long saga to install the kitchen faucet
— break for other projects and vacations —
June 1: Finish installing all of the filler pieces
June 10: Order Cabinet Hardware, build range hood vent.
June 24: Tile backsplash. This process took a weekend to complete including grouting. I went with the Zellige Tile from Floor and Decor and used Musselbound to install it. Process was quick and painless!

July 3: Install cabinet hardware, finish 5%, install white oak back panel and trim. Complete!
June 19: Build White Oak Floating Shelves (tutorial coming soon, for now enjoy my other floating shelf tutorial here).
The Reveal


Sources & Links
Countertops: Chris and Dick’s Portofino Classico Quartz by Della Terra
Cabinet Boxes SEKTION: IKEA Click here for tutorial/budget
Cabinet Drawer Boxes : MAXIMERA
Cabinet Doors: Semihandmade Night Sky
Cabinet Filler Pieces: Semihandmade Night Sky
Cabinet Pulls: Top Knobs
Cabinet Knobs: Top Knobs
Cabinet Decorative Knob Plate: Top Knobs
Kitchen Pendants: Savoy via Amazon
Dining Nook Pendant: Amazon
Luxury Vinyl Planks: Floor and Decor
Backsplash Zellige Tile: Floor and Decor
Musselbound FAQ on how to use Musselbound here.
Musselbound Seam Tape
Farmhouse Sink
Faucet
Bar Stools: Target
Brick: Old Mill Brick Color: Cafe Mocha
Brick Mortar: Natural
Edge Banding White Oak
Favorite Wood Sealer that doesn’t yellow
White oak 1/4″ plywood: MacBeaths local lumber yard.
Floating Shelves: Rifted White oak plywood 1/4″ or 1/2″
TOOLS:
Small Tile Wet Saw
Score and Snap Tile Saw
Large Mitering Tile Wet Saw
Kreg Rip Cut
Circular Saw
Kreg Jig 720
Kreg Foreman
Brad Nailer
Drill
Miter Saw
Table Saw
Stud Finder
DECOR:
Cook Book
Honey Pot
Bowls
Plates
Candlesticks
Copper Mugs
Be sure to follow along on instagram @honeybuilthome for all the DIY projects!


+ show Comments
- Hide Comments
add a comment