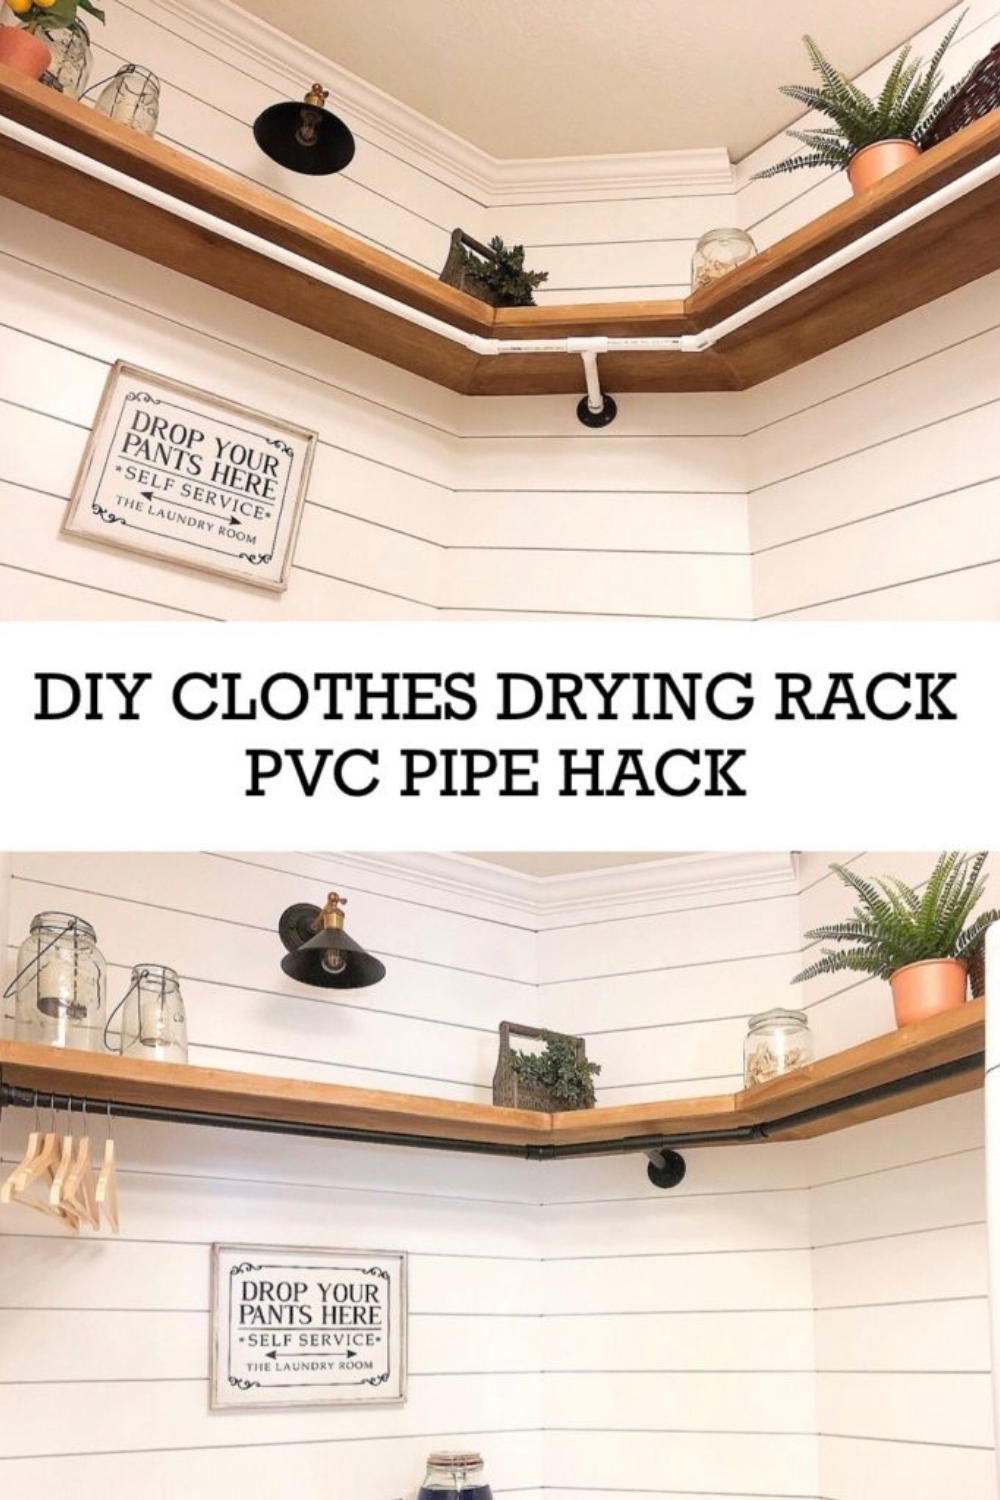
Surprising what a little spray paint and some imagination can conjure up! I’m loving this DIY clothes rod hack!

DIY Clothes Rod
Originally planning the space I knew I wanted a long rod to hang clothes from to dry. I wanted it to look industrial and was planning to use galvanized pipe, but when it came time to purchase the pipe the project became $100+ and I just wasn’t willing to commit.
Other materials I looked into: I thought of doing a wooden dowel, but wood dowels are $21 each and I’d need a few of them. I looked into copper and thought that would be a different element, but copper is equilivant in price to galvanized pipe.
Check out my other posts of my DIY laudry room basket tower, and my laundry room makeover.
So the plumbers daughter in me decided on PVC pipe! Here’s how I did it.


Materials Needed:
(ALL MATERIALS ARE 3/4″ in diameter)
PVC pipe 8′ in length
x2 45 degree fittings
x1 T fitting
x3 male cupplings (the treads on the outside)
x3 black metal flanges
1 1/2″ screws
black spray paint

Due to my angled wall I needed to use more fittings to make the pipe continuously run along the bottom side of my floating shelf.


Steps to DIY clothes rod
- place a hanger next to the wall at the height you want your clothes to hang. It’s helpful if you take the longest item of clothes (pants/shirt) that you are going to hang and hold it up to make sure it doesn’t touch the floor/counter)
- draw a mark with pencil on where the hanger will sit. *using a hanger is important because you want to make sure the hanger is far enough from the wall that it won’t hit if you make your rod too shallow
- Take 1 flange and put its center at the pencil mark. If going into drywall use anchors, if going into a stud use wood screws.
- attach a cupling to the flange and then cut your pipe the distance needed to the next fitting. Mine was 42″ long until it hit my first 45 degree elbow.
More Steps
- on the small wall I measured the height from my counter that my first flange was at and placed my 2nd flange at that same height in the center of the wall.
- Attach a cuppling to the 2nd flange and cut a small pice of PVC attached to a T fitting.
- I then cut two same size pieces to put on either end of the T fitting and connect to the 2 45 degree elbow.
- I then attached my 3rd flange to the wall with another cuppling and short piece of PVC. This piece was then attached to a 90 degree elbow.
- Once the elbow was attached I measured the distance from the 45 degree elbow to the 90 degree elbow and cut a piece of pipe to fit.


I cut each piece a little long and would trim to size as I pieced the entire rod together. Each pipe goes into a fitting about 1/2″ so take that into account as you cut. You can use a hand saw to cut it, I used my miter saw which cut the plastic like butter.
Once all the pieces fit together I then detached them all including unscrewing the flanges from the wall and spray painted them with matte black paint and let dry.

Once everything was dry I reattached. I did not glue the pieces together with PVC glue although you can. Mine fit together so snug that it takes a lot of force and effort to get them apart.

Overall this was a very inexpensive project and due to the short distances of pipe between each fitting it wiggles and wobbles very little.
For more projects and tips, follow along on Instagram @honeybuilthome


+ show Comments
- Hide Comments
add a comment