

One of the ways I decided to save some money on my new house was by building the vanities for each of the bathrooms. I thought this was a great idea, but it’s turned out to be a HUGE project. I’m going to break it down step-by-step on how I made them!
Inspiration:


Planning the Vanities:
I started by using SketchUp to draw up all of my plans to scale. There’s a web version that’s free, just know it takes a minute to learn. SketchUp is something that you can learn on your own if you take the time to figure it out, but it’s also something that I cover in my Online Course, DIY Beginner Basics.
Another great resource I offer is the Renovate by Honey Built Home App. This has many resources within it, but the one that came in VERY handy for the vanities was the Cut List Optimizer. This allows you to plug in all of the dimension of wood you’ll need, and then the size of plywood you’ll be using, and it’ll optimize your cuts so you have the least amount of waste! Because of this resource, I was able to build an entire vanity body, with one piece of plywood.


Cut Your Plywood:
Each of my vanities have different measurements, as they’re all going into different spaces and will be different sizes. I plugged the measurements into the cut list optimizer, and then started on one vanity at a time. This allowed me to keep track of the correct pieces.
Print out the cut list, and then start measuring out your cuts on the piece of plywood. I like to place my plywood on top of an insulation board before cutting with my circular saw. By putting insulation board under the wood, this makes it so you don’t have to use a table saw.
I’m saving money by doing very pretty white oak on the outside of the vanity where it will be seen. On the inside I’m using pre-finished maple that already has a gloss on it. This allows the vanity to look beautiful, without the entire thing having to be made out of expensive White Oak.
*I buy my specialty plywood locally. Here is Salt Lake you can shop at Macbeaths or Intermountain Wood Products. Macbeaths has both plywood and solid hardwood, Intermountain wood is mostly plywood sheets. If you don’t want to use specialty wood I would recommend using 3/4″ Maple plywood which you can find at your local Lowes or Home Depot.


Building the Cabinet Box:
Once all of your pieces are cut to size, you’re ready to drill your pocket holes. Pocket holes make it have a clean finish, without having screws showing on the sides of the wood. You want to do the pocket holes in places where they won’t be seen. For me, I did mine on the top where the counter will set, and on the bottom underneath the vanity (where nobody ever looks).


Face Frame:
Your face frame will depend on the style of cabinet you are wanting. These will be inset cabinets so a face frame is what gives the cabinets a finished look. If you want full overlay cabinets you don’t need a face frame.

I built a face frame that sits perfectly over the top of the cabinet boxes, hiding the seams of each individual box. I first dry-fit the pieces to ensure it would all fit and be perfectly square. With doing inset doors, you want to be sure everything is square or your doors won’t fit/will sit crooked.
Once you know the pieces are all good to go, secure them together using wood glue, and pocket holes. I also used my kreg clamps and some 90 Degree Positioning Squares to be sure they stayed perfectly square while I secured the wood.
Tip when creating face frames – Use spacer boards to ensure the top and bottom are the same size! This sill make sure your door fits perfectly!

After securing the pieces together, you’ll notice that the seams may not look very seamless. A trick for fixing that is to use wood glue at the seam, then sand it down (see the before/after below). Do this instead of using prepackaged wood filler because the fine saw dust from the wood is the perfect color match. This will fill the gap and give it a professional look!


To secure the face frame to the cabinet boxes, I used wood glue, pocket holes as well as finishing nails. The pocket holes were on the top pieces of wood, where they’d be hidden by the counter top. There will also be pocket holes on the underside of the cabinet, so you won’t see those, either! I covered the entire frame with wood glue, and then around the edges of the face frame, I used a brad nailer to secure it. This will just help to keep it all in place.


Beaded Face Frame:
Here’s how I made the beaded detail on the face frame. It was SO much extra work, but I personally feel like it’s worth it!
Cut white oak on table saw to make 1 1/4″, then to the planner to make them all the same exact thickness. I ran each piece through the router twice to bead each edge, and then brought them back to the table saw to cut them to 3/8 and then to the planer to 3/8 to make them exactly the same. Lastly, I had to use the miter saw to cut 45 degree cuts to individually fit each bead into place. I fit them snug in their place, and secured with wood glue.


Vanity Drawers & Doors:
I made the mistake of ordering the wrong size doors (I was off about an inch–I have no clue how!) Because of this, I ended up having to make all my own drawers and doors. The middle drawer is going to be a false drawer, so it was a simple piece of scrap wood installed on the backside of the face frame, just to give the false drawer something to secure to.


After building drawer boxes (video tutorial here) I needed to install the drawer slides. This was a tricky task because I needed to get them perfectly even so the drawer face would sit straight in the beaded frame. The slides install to the side of the cabinet box. I secured a small piece of wood inside, and then installed the slides on that.
Since the cabinet doors I ordered were too small, I was left with the task of building my own. I used a table saw to cut down my wood to my specific dimensions, and then cut some thicker pieces to uses as a frame around the edges, giving it a more finished look.


After these were built, I installed soft close hinges inside the cabinet box, and connected the door! Again, its crucial you get them installed evenly so they sit straight in the face frame.

Stain:

We are SO CLOSE to being done. Next is to stain and seal it. The reason I choose to stain my vanities, is because white oak often turns a bit yellow-ish when you seal it. So by staining first, I’m trying to keep it as close to the natural color as possible.
Finding white oak stains are next to impossible, so I ended up doing two custom color matches. The stain on the left is a white wash, so you see all of the white flecks that are in the grain, and the right option is a little bit darker. Both look BEAUTIFUL on white oak. For this vanity I actually layers the left with 1 coat followed by 1 coat of the right.


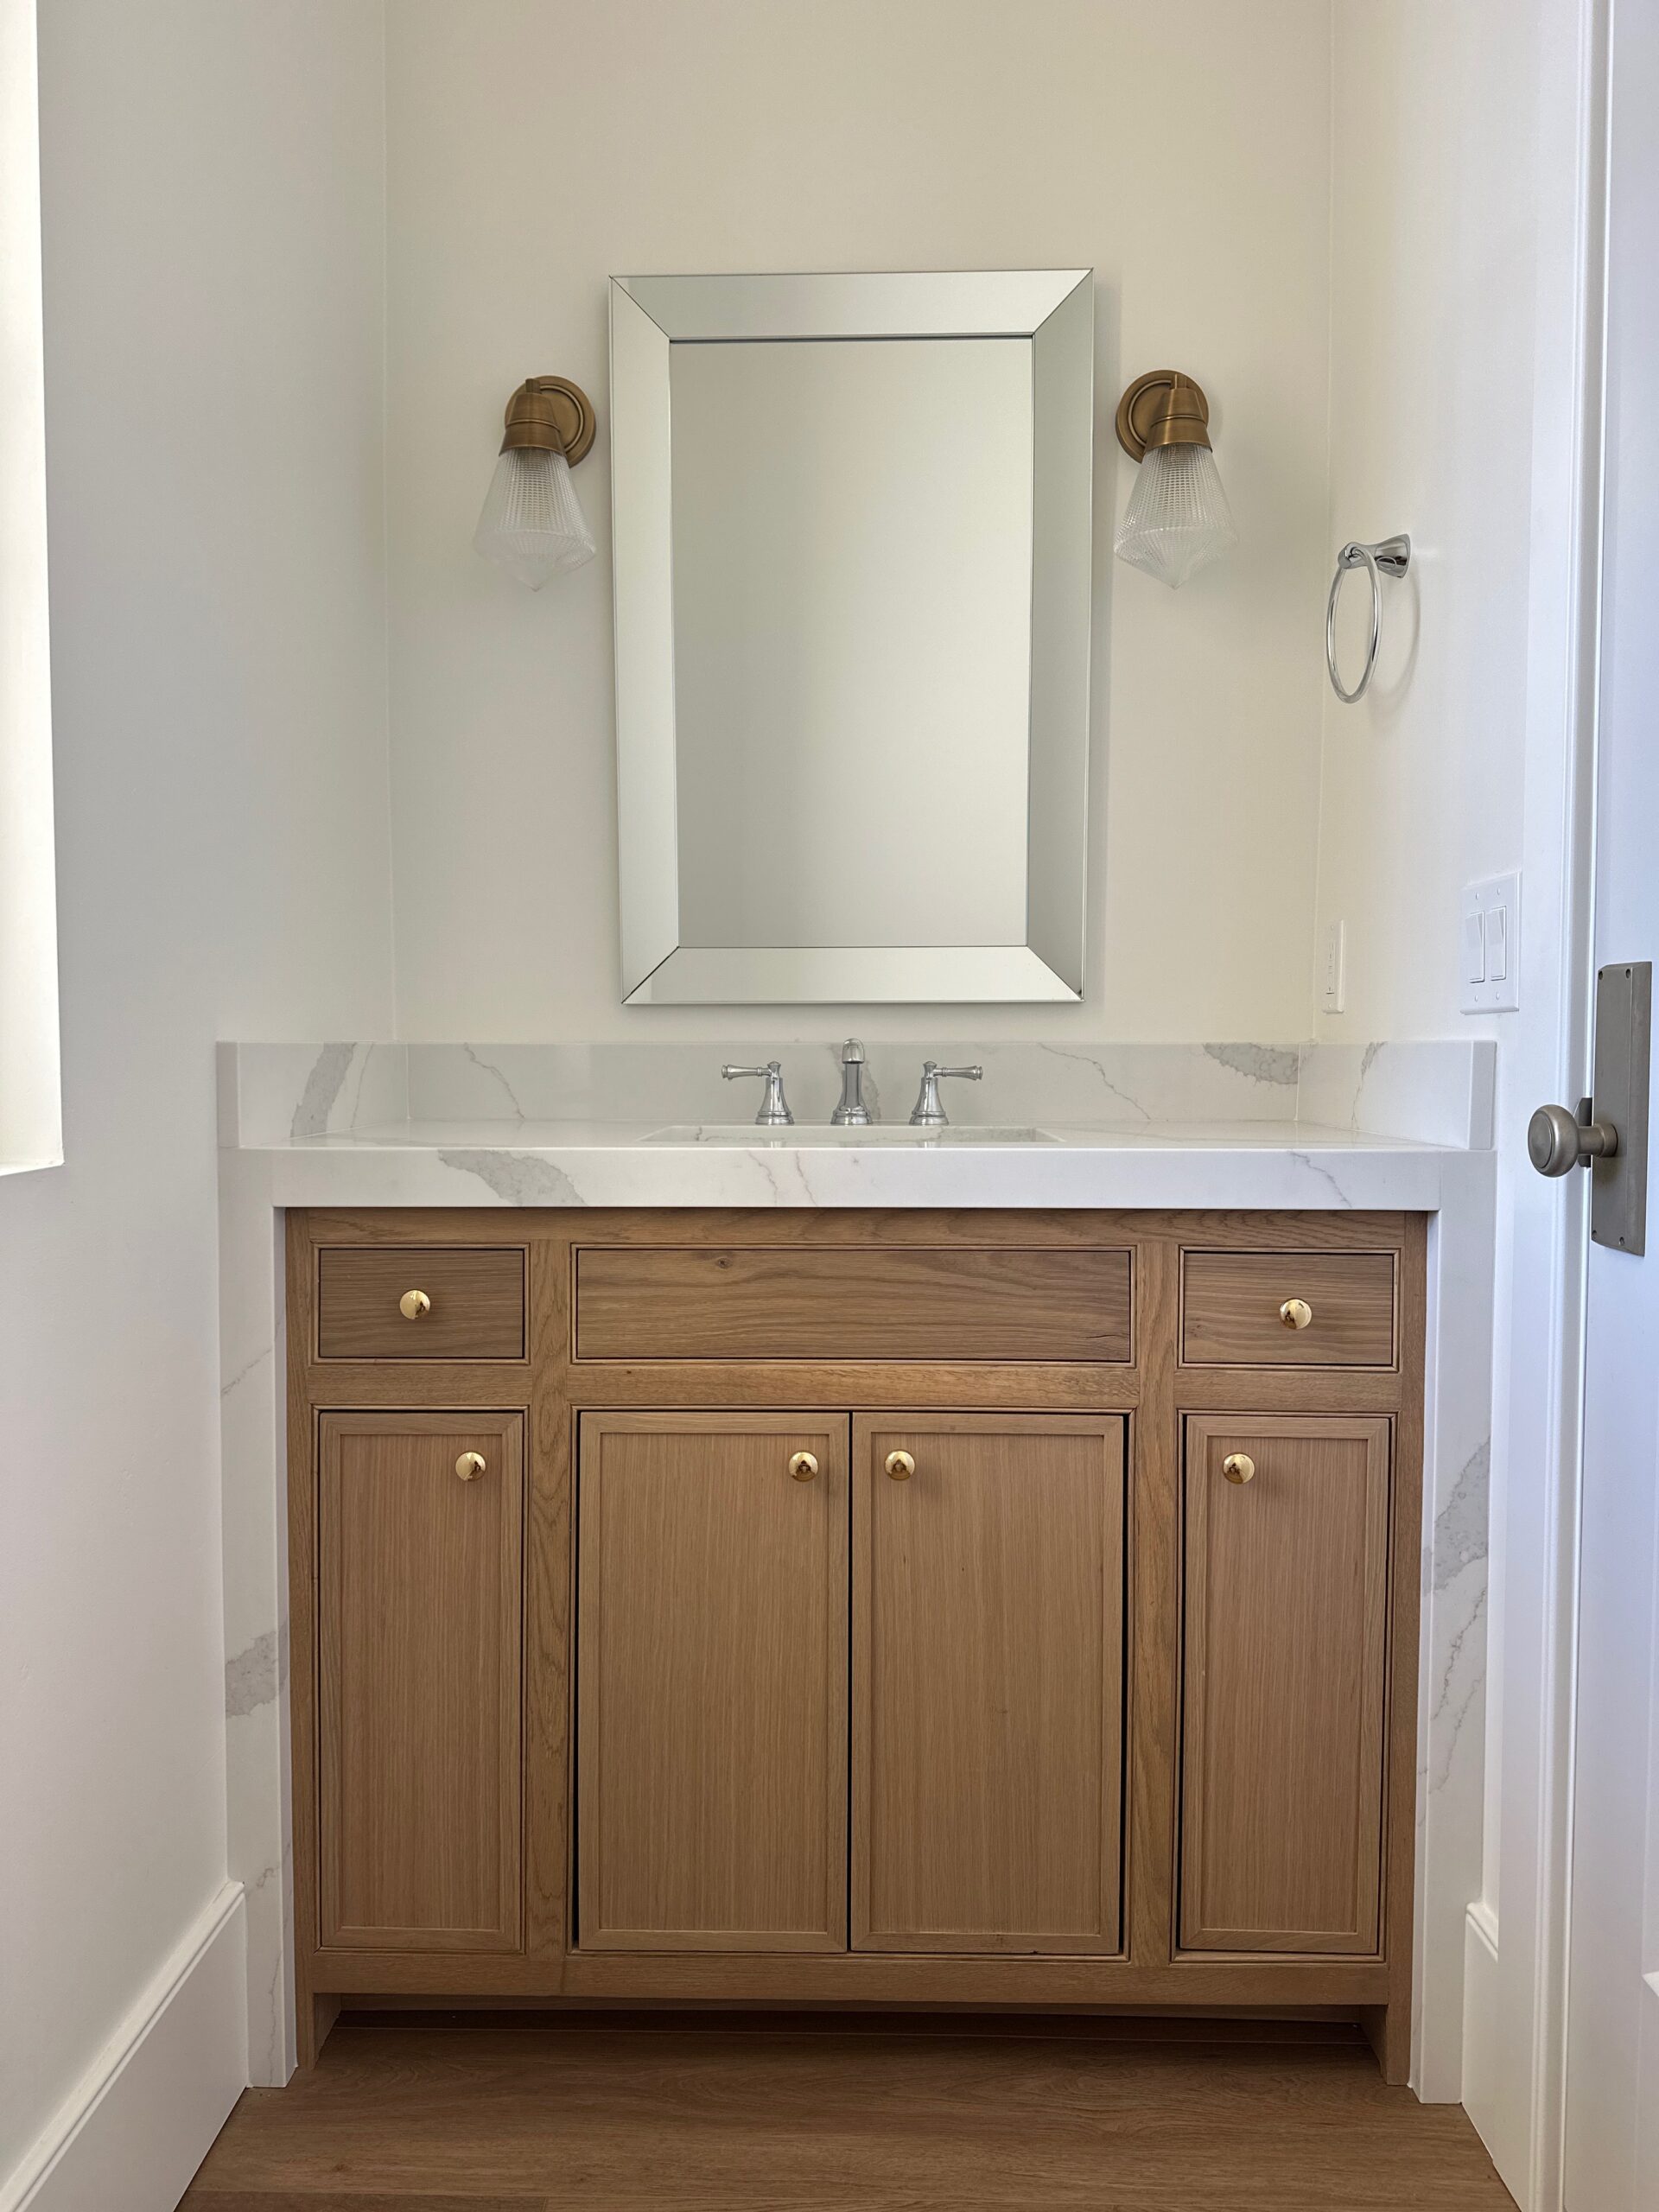
Final Product:


If you’re looking for even more info on how to use Power Tools, build things and start tackling your own projects like this White Oak Vanity Build? Check out my online course, DIY Beginner Basics, that teaches you all of the things you need to feel confident and ready to start. Try a FREE LESSON from the course today!

See even more about the White Oak Vanity build over in my IG Highlight Bubble!
Tools:
Circular Saw
Rip Cut circular saw attachment
Pocket Hole Jig
Planer (Optional)
Orbital Sander
90 Degree Positioning Squares (optional)
Measuring Tape
Table Saw
Wood Glue
OTHER BLOG POSTS YOU MAY LIKE:
Jess’s Primary Bathroom Reno
How to Build a Drawer Box
How to Pick Bathroom & Kitchen Fixtures
5 Ways to Update Your Kids Bathroom for Guests
How to Build a Bathroom Vanity
Budget Bathroom Vanity Lights $150 and under
How To Reface Your Cabinet


+ show Comments
- Hide Comments
add a comment