

I will be the first to admit that I messed up on the girls’ bathroom design 4 different times. Part of the downfall to building a whole home for the first time and trying to design 27 spaces at once while doing a lot of the manual labor, but after many repaints on the vanity and a few design pivots I am SO happy with how the room turned out.


Changing the layout
The first thing I did was modify the layout from what our architect had drawn up. To me, the room felt like a lot of doors and tight spaces, and I wanted the tub to be more of a focal point then shoved inside of the shower room with the shower. (my actual dimensions vary from what’s drawn below) With the new layout there’s a lot less privacy but ways I could have added privacy that I thought of in hindsight like push back the toilet and widen the shower to allow for a door in front of the toilet.

Where we started:
The whole room was waterproofed with Guru’s G flex uncoupling membrane. The install of the whole system was pretty easy, with a thin coat of adhesive then stamp it down, seam tape the seams, and let it dry. Next we tiled the floors with these 30×30 tiles from Bedrosian’s. Let me tell you, these are HARD to install. Any size >18″ is REALLY heavy and hard to maneuver for install.


Timeline wise, in the heat of July we tiled installed the waterproofing in 1 day, let it rest for 24 hours to dry, then tiled the entire floor in 1 day. We paused on the rest of the bathroom to move onto more time sensitive projects and circled back to tile the shower and behind tub wall in September.

More tile:
When tiling a shower you want to start with the floor first, let that dry really well, then tile the walls. This shower is really long so it doesn’t need a door, but after living in our home for a few months my daughters are wanting to add a door to stay warmer while they shower.
I added a marble baseboard the same height as the rest of the rooms baseboards and a marble pencil detail on the edge of the shower wall instead of schluter metal trim. Then we got crazy and added a marble crown molding which just really makes the shower that much extra and awesome. The shower wall tiles are a porcelain so they are easy to clean, and the marble mosaic floor we seal every 4-6 months to keep it clean.


Vanities
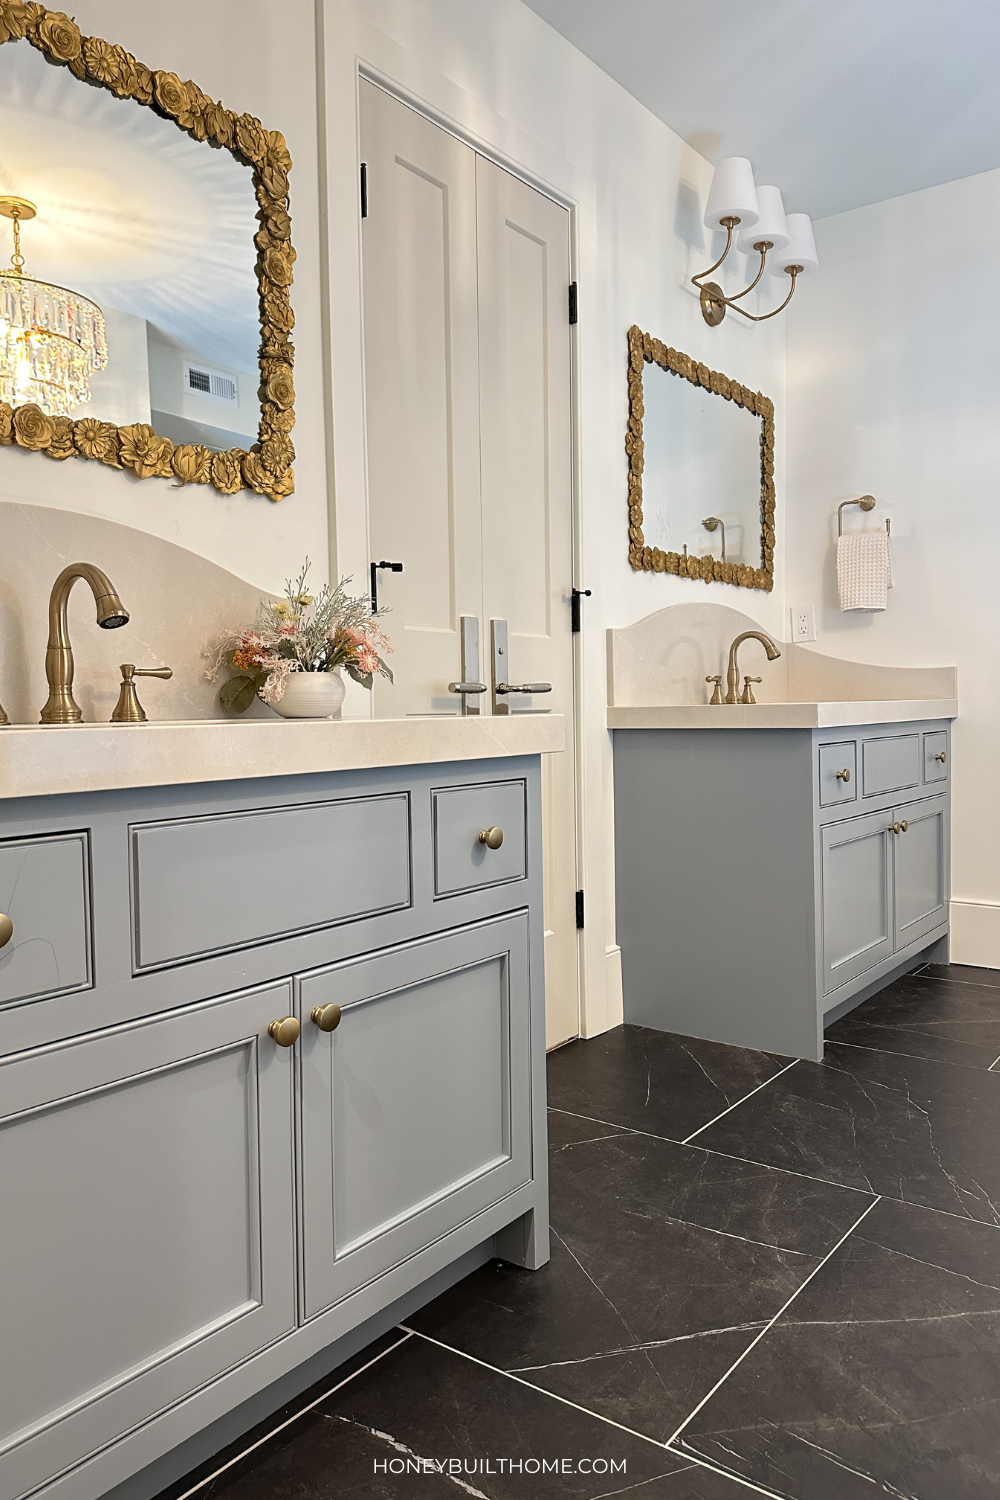
The girls’ bathroom vanity boxes are from Cabinotch. You custom design the cabinets on their website, and they ship them to you for you to assemble (but they only sell to businesses). Then the doors are Chapman style from Fastcabinetdoors.com These were originally painted the same as the door color, BM Natural Linen, but the color felt to bland next to the countertops so I painted them SW Let it Rain (Emerald urethane in satin) and absolutely LOVE how they look with the tile and the counters. The knobs are from Emtek: Providence in French Antique


French Doors
This is a shared bathroom for my girls who also share a bedroom. These double doors go through their closet and into their bedroom. There’s another door that goes into the bathroom from the hallway. The door hardware is from Emtek: Select R-Bar Straight Knurled Lever
Mirrors


These were a fun and lengthy diy project that I’m still smitten by. You can see all the stories of the whole DIY here.
The epoxy resin I picked is a little more expensive than others on the market, but it doesn’t have any odor which is great for doing this project indoors. I mixed the two solutions that came in the kit and pour it into the molds to create these unique flowers. Then I used rub n buff with a tiny paint brush to paint all of the flowers gold. This is totally optional and you could just leave them plain.
I bought an inexpensive builder grade mirror from Home Depot and used some PL Liquid Nails to glue the flowers onto the mirror. To hang the mirror I used the same PL Liquid nails to adhere the mirror onto the wall and used painters tape and the clips that came with the mirror to hold it in place while it dried overnight.


Lights
The lights are made by Crystorama which I got from Lighting Design. They have SO MANY options and it was helpful to work in store, in Draper, with them to go over each room and the style of light we would need for it. The chandelier is multicolored pink, grey, and clear, which is really hard to tell from their stock images, but it fits this bathroom PERFECTLY! The above vanity lights are also from Crystorama.

Bidet
If you are on the fence in your new build on getting a bidet or not, I would say it is DEFINITELY worth the splurge. At least in the building phase put an electrical outlet in all your toilet rooms so you have the option in the future.
The Bidetmate 6000 makes you never want to sit on another toilet ever again and I truly mean that. It automatically opens when it senses you walk into the room. With the push foot button it’ll raise the seat (for the guys in your life), and for us women, after sitting on it, it senses your weight is off the toilet seat and it flushes and closes for you without you pushing any button. Did I mention the toilet seat is HEATED, and of course has all the bidet features for a front wash, back wash, and adjustable warmth of water and pressure.
The end result
I’m so happy with how the whole girls’ bathroom turned out and the last mine art I found at Hobby Lobby to tie the Girly Parisan vibes all together. A special thanks to Delta, Bedrosian’s, Crystorama, and Bidetmate for gifting products to make this bathroom come together.

See more of this project on IG Reels


Girls’ Bathroom Links
Wall color: BM Swiss Coffee
Door color: BM Natural Linen
Vanity color: SW Let it Rain
Counters: Eternal Desert Silver 2cm – I had the fabricators create a swooped backsplash instead of a standard 4″ splash for a fun added detail.
Shower Wall Tile
Marble Chair Railing
Marble Pencil Tile
Shower Floor Tile
Marble “Baseboard” tile
Marble Crown Molding tile
Bathroom Floor tile
Shower Grout
Floor Grout
Marble Grout and Tile Sealer
Faucets
Bathtub – Delta discontinued
Bathtub Filler
Shower fixture + this one
Mirrors: DIY supplies here and tutorial here
Above tub chandelier
Bidet
Art above tub
OTHER BLOG POSTS YOU MAY LIKE:
Jess’s Primary Bathroom Reno
How to Pick Bathroom & Kitchen Fixtures
5 Ways to Update Your Kids Bathroom for Guests
How to Build a Bathroom Vanity
How To Reface Your Cabinet
Budget Bathroom Vanity Lights $150 and under


+ show Comments
- Hide Comments
add a comment