

I’m still in shock that this is MY primary bathroom. The blood, sweat and tears that have gone into this space really help me to have the greatest appreciation for it. This bathroom is full of SO many small DIYs that I’m truly just so proud of. I’ve compiled all of the sources and projects that took place to create such a beautiful space.


Walls & Flooring:
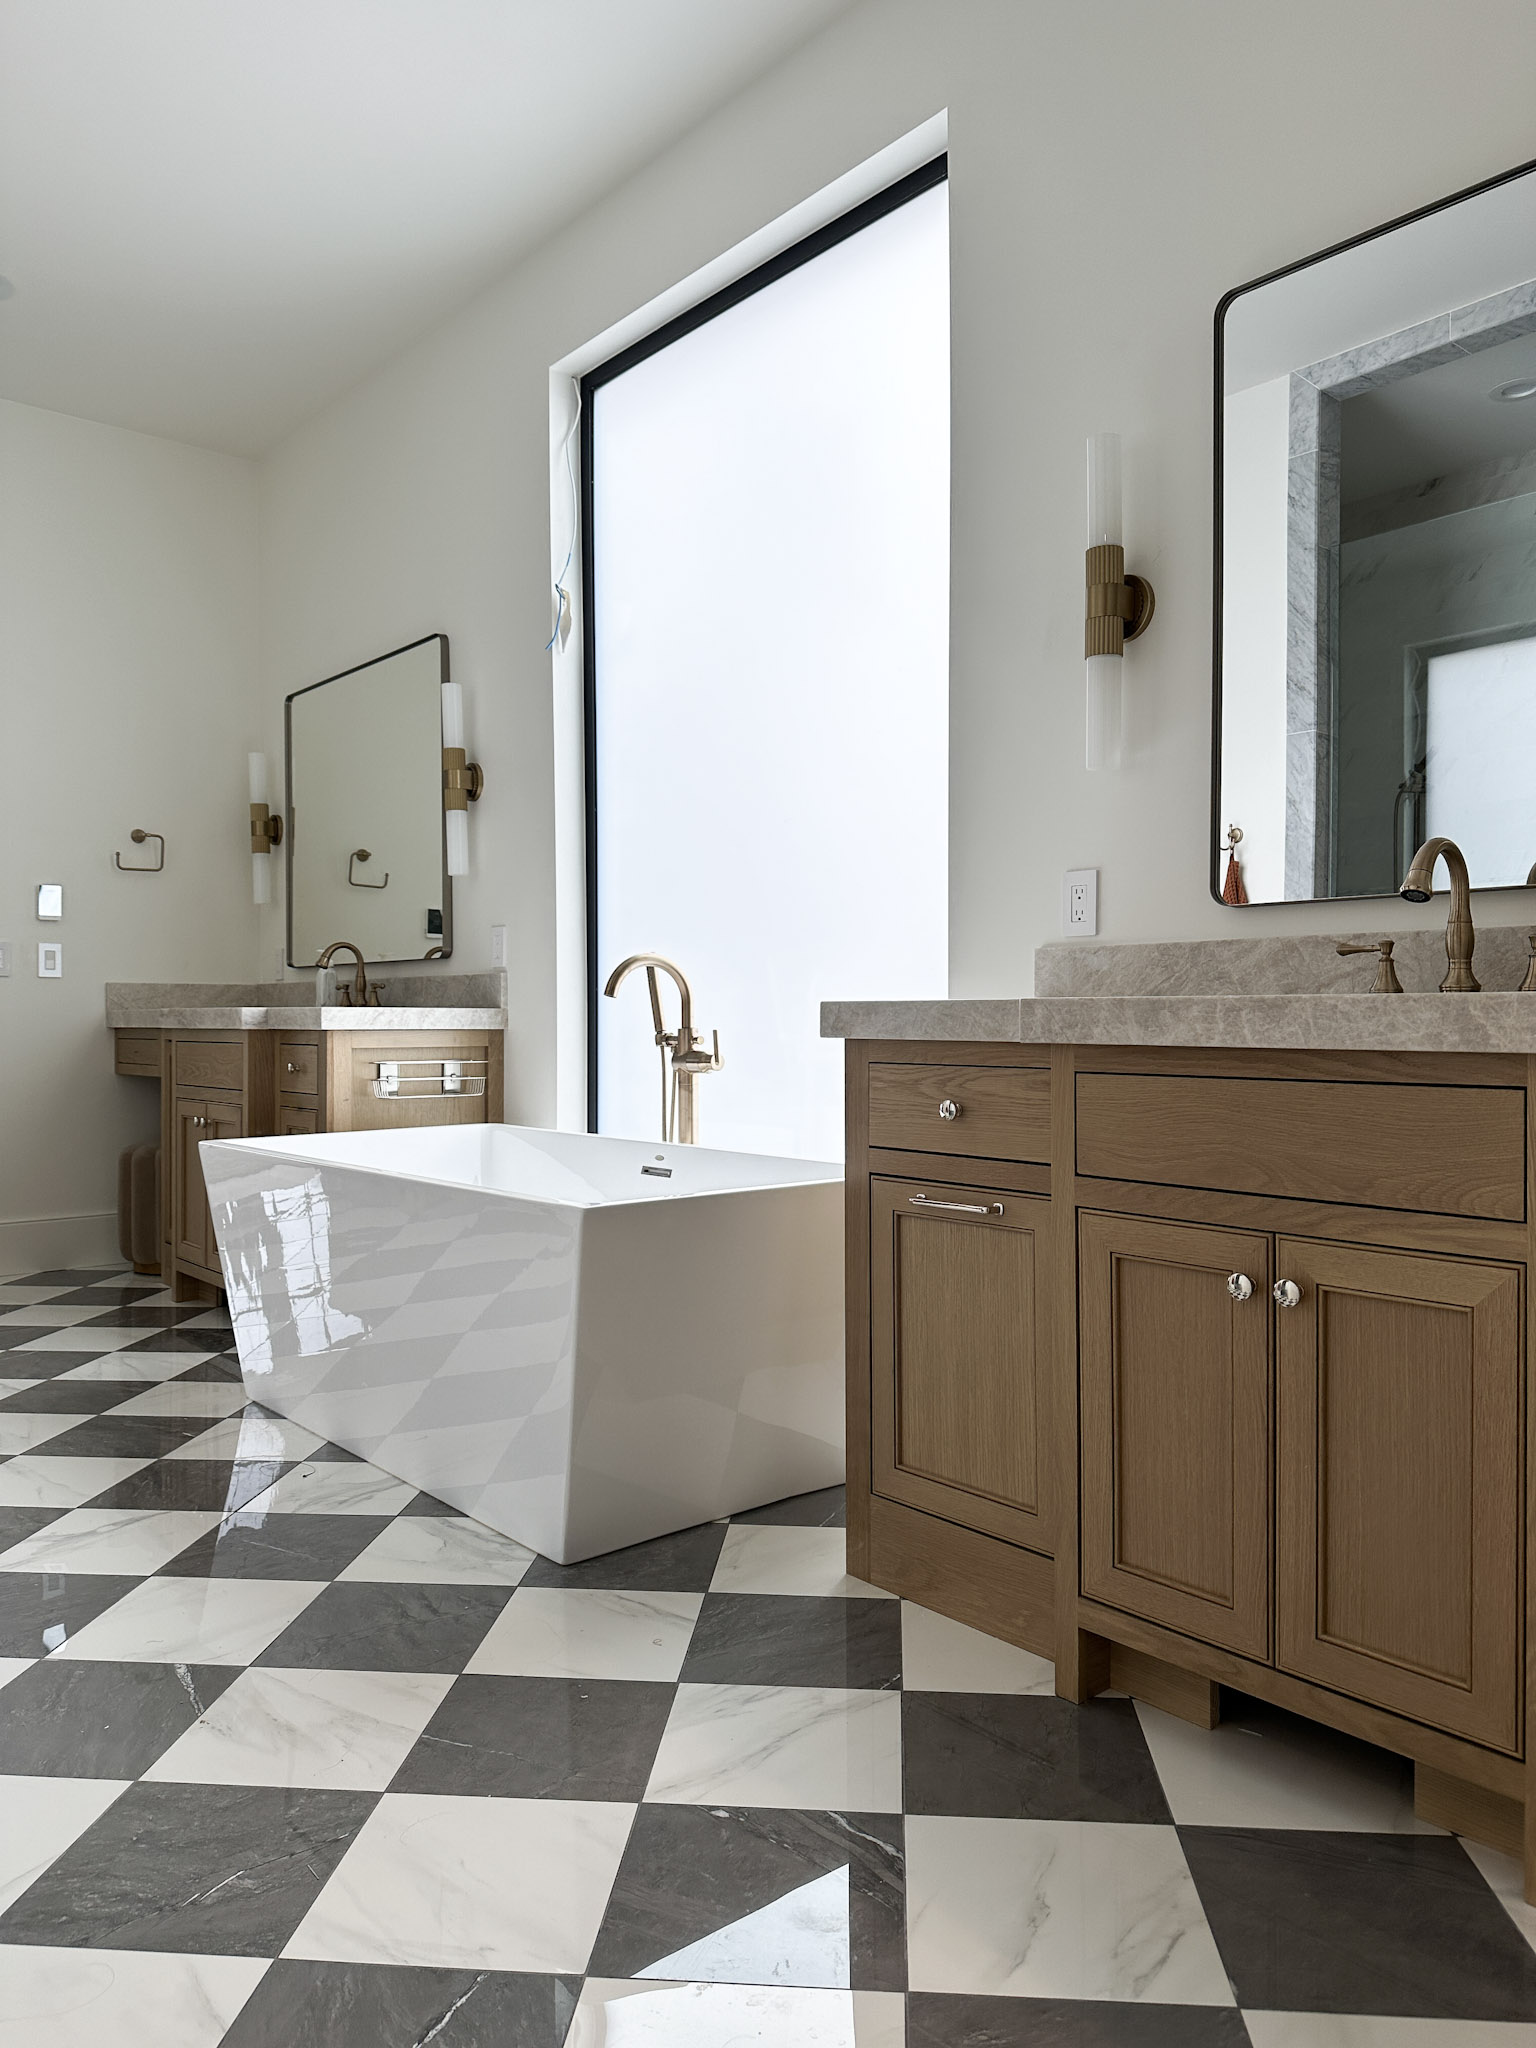
Let’s start with the flooring. The tile I chose for the floor were actually rectangle porcelain tiles. Because of that, each piece had to be cut to 12″ (the white pieces had to be cut on THREE sides) and then polish/grind the edges smooth. Since it was a very complicated project, I decided to have my contractor, Angel, tackle this tiling project, while I tiled the rest of the bathrooms.
I couldn’t find a porcelain or ceramic tile that was polished with simple veining that came in a square (I could only find expensive marble) which is why I went the labor intensive route and choose 12×24 tiles and cut them. With this tile floor being a walkway into our closet and a high traffic room, I didn’t want the high maintenance of having marble on the floor as well as in the shower.
Wall Paint – Benjamin Moore Swiss Coffee
Door Paint – Benjamin Moore Natural Cream
Trim – Beaded from Mountain View Builders Supply
Doors – Two Panel from Masonite Doors
Door Handle – White Tumbled Bronze Door Knob from Emtek
Tile Transition Piece
White Tile
Grey Tile
Heated Floors are from Schulter
Vanities:
The Vanities were a hybrid build. I had wanted to have white oak, inset vanities with drawers and the quote I got was $4500 per vanity. I could have changed the style and not done drawers, real white oak, or inset, but I found a way to get my dream vanities for a fraction of my quote.
Mine cost $1001 ($313 doors, $476 carcass, $212 drawers & hardware). For these vanities, I went with a 21″ depth and a 24″ depth to give a little bump out. I designed the cabinets and ordered the boxes from Cabinotch. I also ordered the details Chapman doors raw from Fastcabinetdoors, then assembled everything. As for DIY, I built the slab drawer fronts and end panels from scratch, and then stained and sealed it all by hand. While these were a hybrid build, I did build my other vanities from scratch, as well as the cabinet boxes.
Drawer Pulls
Cabinet Hardware
Sink Faucet
Counter Tops – Brushed Taj Mahal Quartzite from Bedrock Quartz
Mirrors
Vanity Lights
Soap Dispenser
Vanity Stool
Towel Hooks
Towels
Bath & Shower:
Bathtub – Slade Tub (Discontinued). Similar Here
Bath Faucet/Filler
Shower Floor Tile
Shower Bench Tile
Upper-Wall Tile
Shower Head
Slide Bar Hand Shower
Soap Dispenser
Window Behind Bathtub – Soniq Windows and Doors Smart Glass
Toilet – Bidetmate 6000
Get a bidet


If you are on the fence on getting a bidet, I would say it is DEFINITELY worth the splurge. If you’re in the building phase, at least put an electrical outlet in all your toilet rooms. This will give you the option to install a bidet later.
The Bidetmate 6000 makes you never want to sit on another toilet ever again and I truly mean that. It automatically opens when it senses you walk into the room. With the push foot button it’ll raise the seat for the guys in your life. For us women, it senses your weight is off the toilet seat and it flushes and closes for you, automatically. Did I mention the toilet seat is HEATED?! It all the bidet features for a front wash, back wash, and adjustable warmth of water and pressure.
I’m thrilled that this room is finally finished and can’t wait to start tackling the other bathrooms/rooms in my house. Be sure to follow along on IG where I share my projects in real time!
Want to see the IG Reels from this project? Check them out by clicking the pictures below!


Other Blog Posts You Might Like:
New House: Tile selections, Fixtures & Plans
How to Build a White Oak Vanity
How To Reface Your Cabinet
Jess’s Primary Bathroom Reno
Refresh Your Ugly Grout


+ show Comments
- Hide Comments
add a comment