
How to Shiplap your Island on a Budget

I get excited when I am able to share a project that not only is BEAUTIFUL and done on a budget. Just like this $55 like this shiplap island. When we first moved into our home I knew the headboard was nice, but it definitely wasn’t my style. I continued to live with it because the thought of changing something “new” and “nice” wasn’t a world I wanted to dive in quite yet. However, over the last year my kids have taken a beating with bar stool legs, markers, and lots and lots of scrapes and scratches. I finally felt like any change was better than keeping the current situation.
Full video of behind the scenes can be found on my instagram @honeybuilthome


Removable of Beadboard
I decided to take a butter knife to pry the corner edge away to completely remove the beadboard.. Yes this was my most used tool during demo. The board was secured to the island cabinetry with liquid nails and tiny pin nails. So once I got a good lever under it came off pretty easily.

Next I examined the headboard and found it to be 1/4″ thick. If wanted to match it I would need to find a shiplap looking product that was also 1/4″ thick. Therefore, my favorite pre-made shiplap was out of question simply due to its thickness.
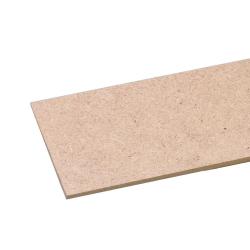
I had some left over bender board from the playhouse under the stairs project. While its thinner than traditional shiplap I thought it looked good and gave a modern flare for this shiplap island.
The best part of this bender board is its cost! it’s $2.75 per plank. Basically its MDF board that has been precut to 3 3/4″ strips. My Home Depot carries it over by the roofing supplies. It beats having to buy a HUGE sheet cutting it into strips. This is definitely an option if you are looking for a wider shiplap island look.
Cutting Bender Board
I like to measure and cut one board to size, then rough fit it. If it fits then I proceed to cut all my boards. For this project I used 3 different types of saws. First, a miter saw to cut the boards to size. Second, a table saw to cut some of the boards horizontally. Finally, a jig saw to cut around outlets and other funky cuts. If you don’t have access to all of these tools you could do all of these cuts with a $30 jig saw. Or borrow a friends or buy a circular saw which is usually around $50.


Shop Power Tools at The Home Depot!
Outlet Cuts:
Measure and draw a square on your board that aligns with the outlet. Drill a hole in each corner on the inside. Once the four holes are drilled connect the dots with a jig saw. Be sure to hold your wood tight to avoid the blade from bouncing and creating jagged lines.

Free shipping on most orders over $45

Plan Shiplap Island Spacing
Lay out all of your boards with spacers to the height of your cabinet. I started this project with a full board on the bottom and continued my way up. As I reached the top I noticed I was going to have a less than 1 inch sliver at the top. To avoid this, I removed all my boards and cut down my bottom board to 2 1/2 inches. Making the first board smaller allows for me to have a 2 inch board at the top instead of a tiny board. You too can avoid this mistake by laying out your pieces with spacers ahead of time. Getting the right height before install to make the project smoother.


Install:
Once the boards were cut its time to install with 1/2″-3/4″ pin nails. I used 3/4″ brad nails for mine which is a larger head and in some areas did shoot through the cabinet causing me to fill the inside of the cabinet. I would also suggest applying some liquid nails to the back of your boards to help them from bowing away from the island and if you can to go with the 1/2″ pin nails!!!
Prep for paint:
When all of the boards are installed fill the nail holes with plastic wood nail filler, caulk the seams. When caulking take a flat end screw driver/extra nails/butter knife and clean out your “shiplap gaps.” This will give you a clean professional look. Sand down nail holes with 120 grit followed by 220 grit for an extra smooth surface, clean off any saw dust then take a tack cloth to remove any of the super fine dust that cleaning didn’t get.

Paint Sprayer or Roller?
I actually used both on this project so you could certainly use either. I will say my paint sprayer did give a smoother finish, but if you aren’t in the market for a paint sprayer I would use a 2″ angled brushed and a foam roller. With either be sure to go back after its painted with a butter knife or some flat edge and remove and of the paint drippings that is in the “shiplap gaps.”

Trim Pieces
I lucked out and the beadboard island already had trim pieces that I reused, but if you don’t have existing trim pieces here’s a few recommendations.
1. Where your corners meet you could put a 45 degree angle on both boards so the butt up to a point.
2. Buy some L shaped trim and nail on top.
What kind of paint did you use?
I am super particular about paint when it comes to cabinetry like surfaces. I wanted it
1. to hold up and not chip,
2. match the color of the cabinet doors, and
3. be easy to clean.
Primer x2 coats. I used Kilz since that is what I had on hand.
Paint: I went with Sherwin Williams Emerald Line in Urethane Trim Enamel. It’s self leveling properties and it cures and hardens but is isn’t oil based so it doesn’t yellow over time.
I brought an existing drawer into the store with me and had it color matched.
Be sure to follow along @honeybuilthome for more tips/tricks and projects


This post contains affiliate links and I will be compensated if you make a purchase after clicking on my links


