DIY

Mudroom Locker Tutorial

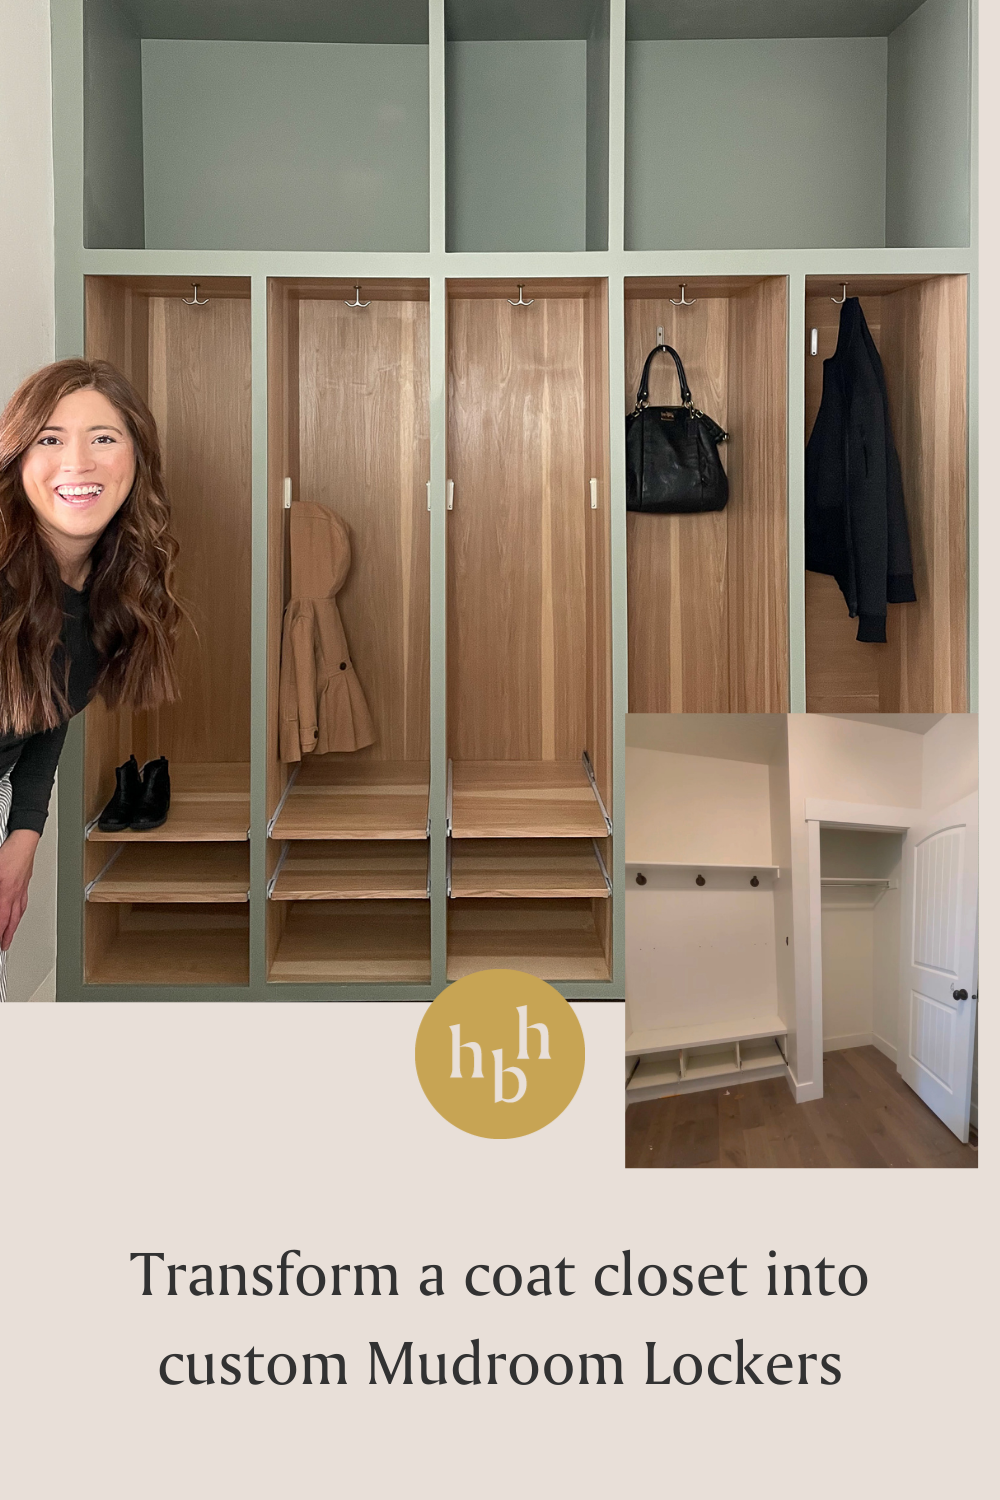
Transform a coat closet into custom builtin mudroom lockers

You know those days when the kids get home from school, and it’s back out the door for some sport, or event? Those are the days when a mudroom locker comes in handy. You just throw all the junk into the lockers, close the doors… voila! The mess disappears!


We moved into our house and it came with a builder grade shoe cubby + a few hooks and a coat closet. The space was definitely under utilized, and has been a disaster to keep organized over the years. My first attempt was to turn the cubbies into drawers to help hide the shoe clutter while using the existing cubby and their dimensions. This worked well for my 3 kids as they were in their preschool and toddler years, but as they grew so did their shoe size which meant I could only fit 2-3 pairs of shoes in each drawer, without their winter boots. It was finally time for an upgrade so I took my utility knife and hammer to the coat closet and completely removed it to accommodate 5 floor to ceiling lockers for our family of 5. Here’s how I built our mudroom locker.

Dimensions for the Mudroom Locker

These were custom built wall to wall so my dimensions will be different from yours, but to give you an idea. I went with 16.75” wide for each locker (the length of the wall – 2 inches wiggle room – thickness of material / # of lockers). x 22.5” deep (as deep as you could comfortably reach into the locker) x 71” tall (yup, a grown man can fit in our lockers, here’s proof).

I opted to use a different material than I had originally planned because I found these 3/4” birch / melamine on clearance at my local lumber yard, MacBeath’s. Finding a deal on this sheeted plywood saved me $300 on this project, but also altered my building plans to make the project a little more complicated. You see, with plywood that is different on each side it had to construct each locker individually sandwiching the melamine between the lockers. If I would have done this project using 2 sided plywood (same wood on both sides) I could have made each locker about 1 1/2” wider, and all of the lockers combined! See Example below of the differences in construction of the mudroom locker.

Mudroom Dimensions

Locker Construction for the Mudroom Locker

Using my plywood cutting calculator, I ran my rip cut + circular saw over each sheet of plywood to get 10 small rectangles and 10 large long rectangles. These would make the tops and sides for each locker.

Drill pocket holes into each top and bottom and secure them with wood glue and clamps into the left and right hand side of each locker. Be sure to use a speed square, clamps to hold all the boards flush, and don’t skimp on the wood glue. Remember glue is stronger than screws in wood!

Once each locker box is built rip down 1/4” plywood to size for the backing. The backing not only esthetically makes the lockers look like solid wood and beautiful, but it helps keep the locker square and adds strength. Secure the backing with wood glue and 1” brad nails.

mudroom locker construction
locker

Platform

The platform of the lockers is 2×3’s secured into the wood subfloor as well as the studs within the wall. The 2×3’s run width of the room wall to wall with support pieces where each locker corner will sit. If you have a floating floor like laminate or luxury vinyl or carpet you are going to want to remove it where you place this platform. If you have a solid floor like tile or hardwood you can lay the platform directly over your floor. Use shims to make sure the platform is level.

mudroom locker platform

Install the Lockers

One by one, or two by two install the lockers on top of the platform. Inserting screws from inside the locker into the base and into the studs in the back wall. Secure a few screws and brad nails between each locker to combine the lockers. Most important to make sure the front of each locker sits flush to the next. This will be super important for adding on the face frame or edge banding.

If your house is like mine, your lockers will be perfectly straight, but your walls will be wonky with a small to large gap on each side. To fill in this gap I used a piece of 1×3” wood trim and scribed it to the unevenness of the wall. Cut it with a jig saw and installed with wood glue and a brad nailer. Using 1×2” select pine or poplar measure and cut for a face frame. Install with wood glue and brad nail.

For more tutorials, take a look at my office built-ins.

locker install
mudroom locker install

Sanding & Sealing

The inside of each locker I chose to keep wood toned with the natural Hickory shining through. In order to keep it durable against children and their wet shoes the plywood needs to be sanded lightly with 220 grit, and sealed. I sealed it with 3 coats of General Finishes High Performance in Satin, sanding with 220 grit lightly between each coat and wiping down with a tack cloth.

Pull Out Shoe Shelves

Building these simple but extremely practical pull out drawers was pretty controversial in my DM’s, but having lived years with a shoe drawer, I knew I didn’t want to deal with the mess of tossing the shoes in. The shoes get filthy so quickly, and you can’t fit very many into the drawer. Having the shoes on these pull out shelves allowed for 4-5 pairs per shelf x 3 shelves, that’s a LOT of shoes, all organized which makes me #happy.

Each shelf is made of the same 3/4” hickory plywood depth of the locker x the width of the locker -1” to accommodate the drawer slides.

shoe shelves mudroom
mudroom lockers

Paint

The entire locker unit on the exterior is painted with Sherwin Williams Evergreen Fog in Emerald Urethane Trim Enamel in Satin & finished with shallow style shaker doors from Nieu Cabinet Doors.

Up next, installing doors, hardware and the shoe shelf drawers.  Stay tuned for part 2. 

In the meanwhile, check out my other blog posts on how I decorated the mudroom lockers and my shoe drawer tutorial.  and how I installed luxury vinyl floors over engineered hardwood floors. Follow me on IG @honeybuilthome :

+ show Comments

- Hide Comments

add a comment

Reply...

for every level of DIYer

Renovate with Honey Built Home
The app to organize all your projects! 

Follow along an existing Honey Built Home project template or utilize the app to track your tasks, materials, receipts, budget, and keep your design inspirations all in one place, your pocket. 

Apple Store

Google Play Store

new!

Meet Christine Gummersall, a mother of 4, coach's wife, former Labor and Delivery nurse, and self taught DIYer who decided to take a sledge hammer to her 1950's bathroom over a decade ago and hasn't stopped tackling her honey-do list since.  Folow along as christine breaks down the pretty afters, by showing the whole how to process and empowers you to STOP waiting, and START creating a home you love, with your own two hands! 

Say HI on insta