DISCLAIMER: This post is sponsored by DAP and also includes affiliate links.
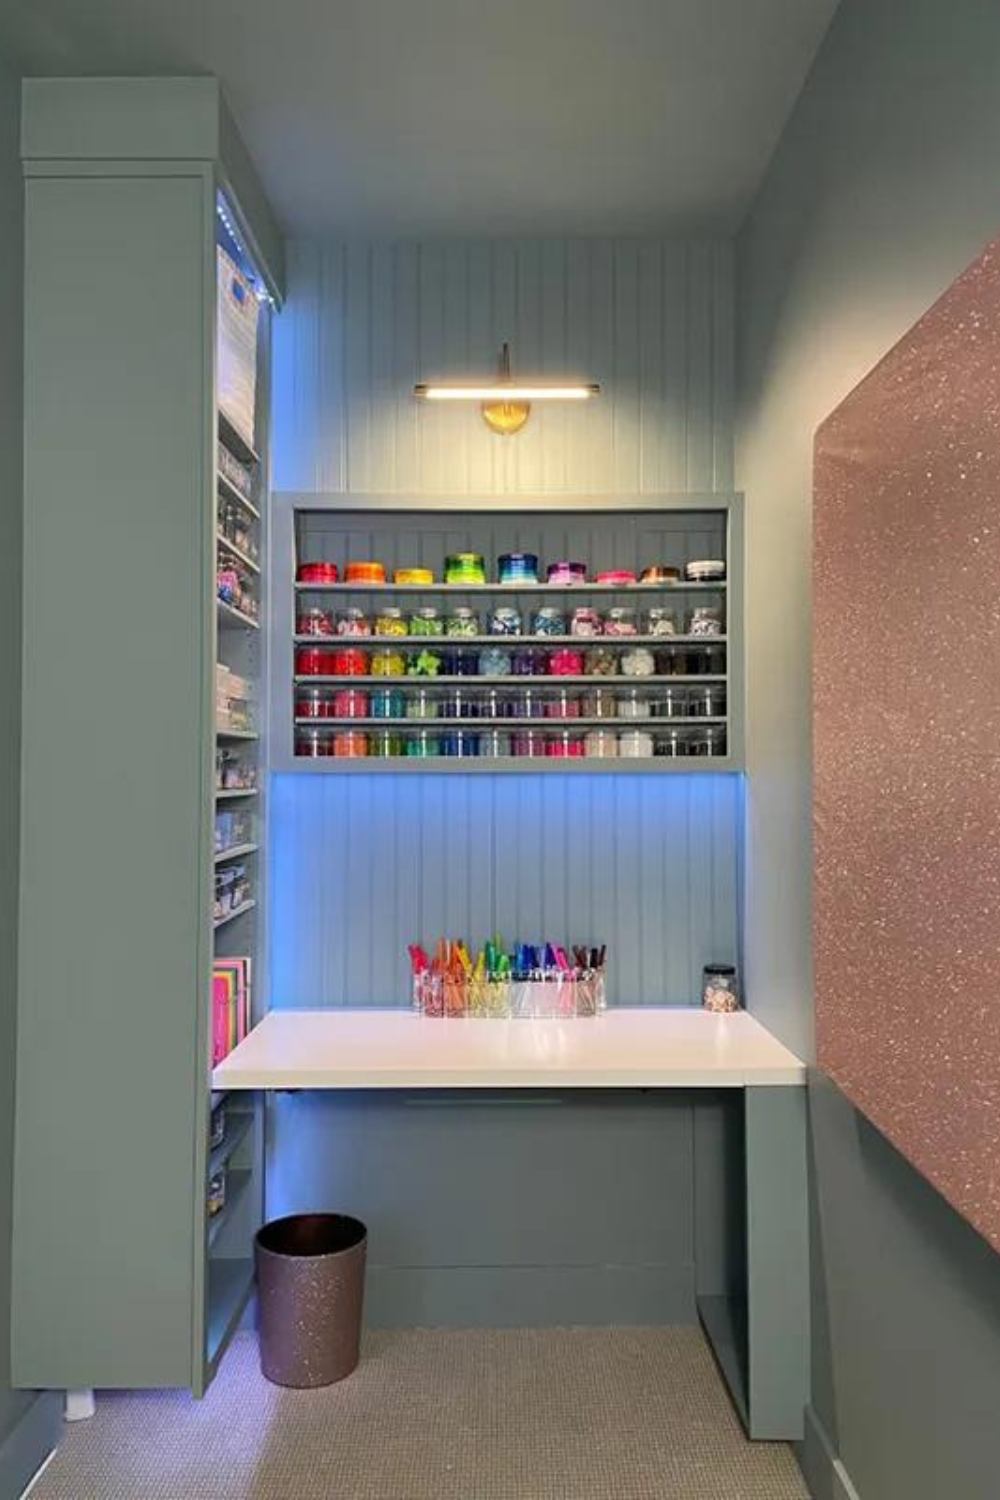
We have a huge closet space in our temporary playroom that we have never finished. And I have had my eye on the Dreambox Crafting closet system for some time now, but they are extremely expensive (like, $2,500 expensive!). I knew I could DIY this myself, and make it customized to our family so it can easily convert to a regular closet when we need it to.
Step 1
Tape out your area. I use a laser level to make my marks on the wall with painters tape, and I also use a software called Sketchup to create my vision digitally. You can use the free web based version (PS- I teach the basics of using this software in my DIY beginners course, use code: Honeybuilt10 for 10% off).


Step 2
The very first thing I built for this area were the cabinet boxes. I chose to use 3/4″ Sande plywood for the box, and 1/2″ for the shelves. You could also use birch or maple plywood. Then, I used my circular saw to rip down my plywood to the size I needed, and then my Kregjig to assemble the boxes. Also, since I am going to have multiple adjustable shelves, I used my pin hole jig to make my pin holes for the shelves.

Step 3
Once my boxes were in place and I was ready to add my shelves, I used edge banding on the fronts of my shelves. You use a clothing iron and literally iron it on, giving you a smooth surface to paint over and hides the layers of the plywood.
Step 4
To give this craft closet a true built in look, I added face frame to my cabinets to close the gap between the cabinet box and the walls. I tried something new with this project and used u-scribe jigs to mark my boards. Tip: If your face frame trim isn’t sitting flush you can use a few paint sample cards to make them flush before you nail the boards in place.

Step 5
Once I had all my face framing complete, it was time to give this a finished look! I used my favorite DAP plastic wood filler— it goes on pink and then dries a natural wood color. It is paintable AND stainable. I apply a decent amount and then sand it down with 220 grit sand paper. One of the most frequent questions I am asked is when is it appropriate to use wood filler and when should you use caulk. My general rule is wood filler is for nail holes, seems in between wood, and outside corners. Once I was finished with that, I moved to caulking the inside corners. DAP Alex Plus Fast dry is my go to, and they just released a new version that doesn’t require a caulk gun- it comes out like squeezy cheese! When you caulk, make sure you cut your tip very small and at an angle to prevent waste and to make a straight line. And always wipe your caulk line clean with a baby wipe- it’s a game changer!

Step 6
For the desktop, I chose to use an Ikea Linnmon 39″ tabletop. It’s not super high quality, but it’s only $8.99 and it’s easy to clean. I also chose to use folding brackets from Amazon so we can easily fold the tabletop down when we aren’t using it.

I wanted to make this space extra special so I added a few extra touches. First, I made a DIY pin board for my daughter to display her projects (you can see the step by step instructions here). I got various acrylic containers from TJ Maxx and Amazon to sort all of our supplies. Finally, I added LED strip lights under the cabinets!

Now, for the total cost breakdown:
- Built in cabinets and desk: $206
- Lights: $79
- DIY Pin Board: $42 tutorial linked here
- Acrylic Containers: $243
- Total: $570
I am so happy with how this closet turned out. I invested a lot of time into this space, but I know my daughter will enjoy it for years to come!


+ show Comments
- Hide Comments
add a comment