

When we were designing our home, one of our priorities was creating space for our family to live in, not just to walk through. We imagined a place where the kids could run, shoot hoops, play with friends, and stay active year-round. We liked the idea of having a basketball court, but once we began pricing what it would cost to attach a court to the house, we realized we needed another plan. In 2023, the cost to attach a half court addition to our home was quoted at $266,000. A full court would have been over $500,000.

We still knew we wanted the space. We just needed to find a different way to make it work. That led us to the idea of building a detached structure, specifically a pole barn.
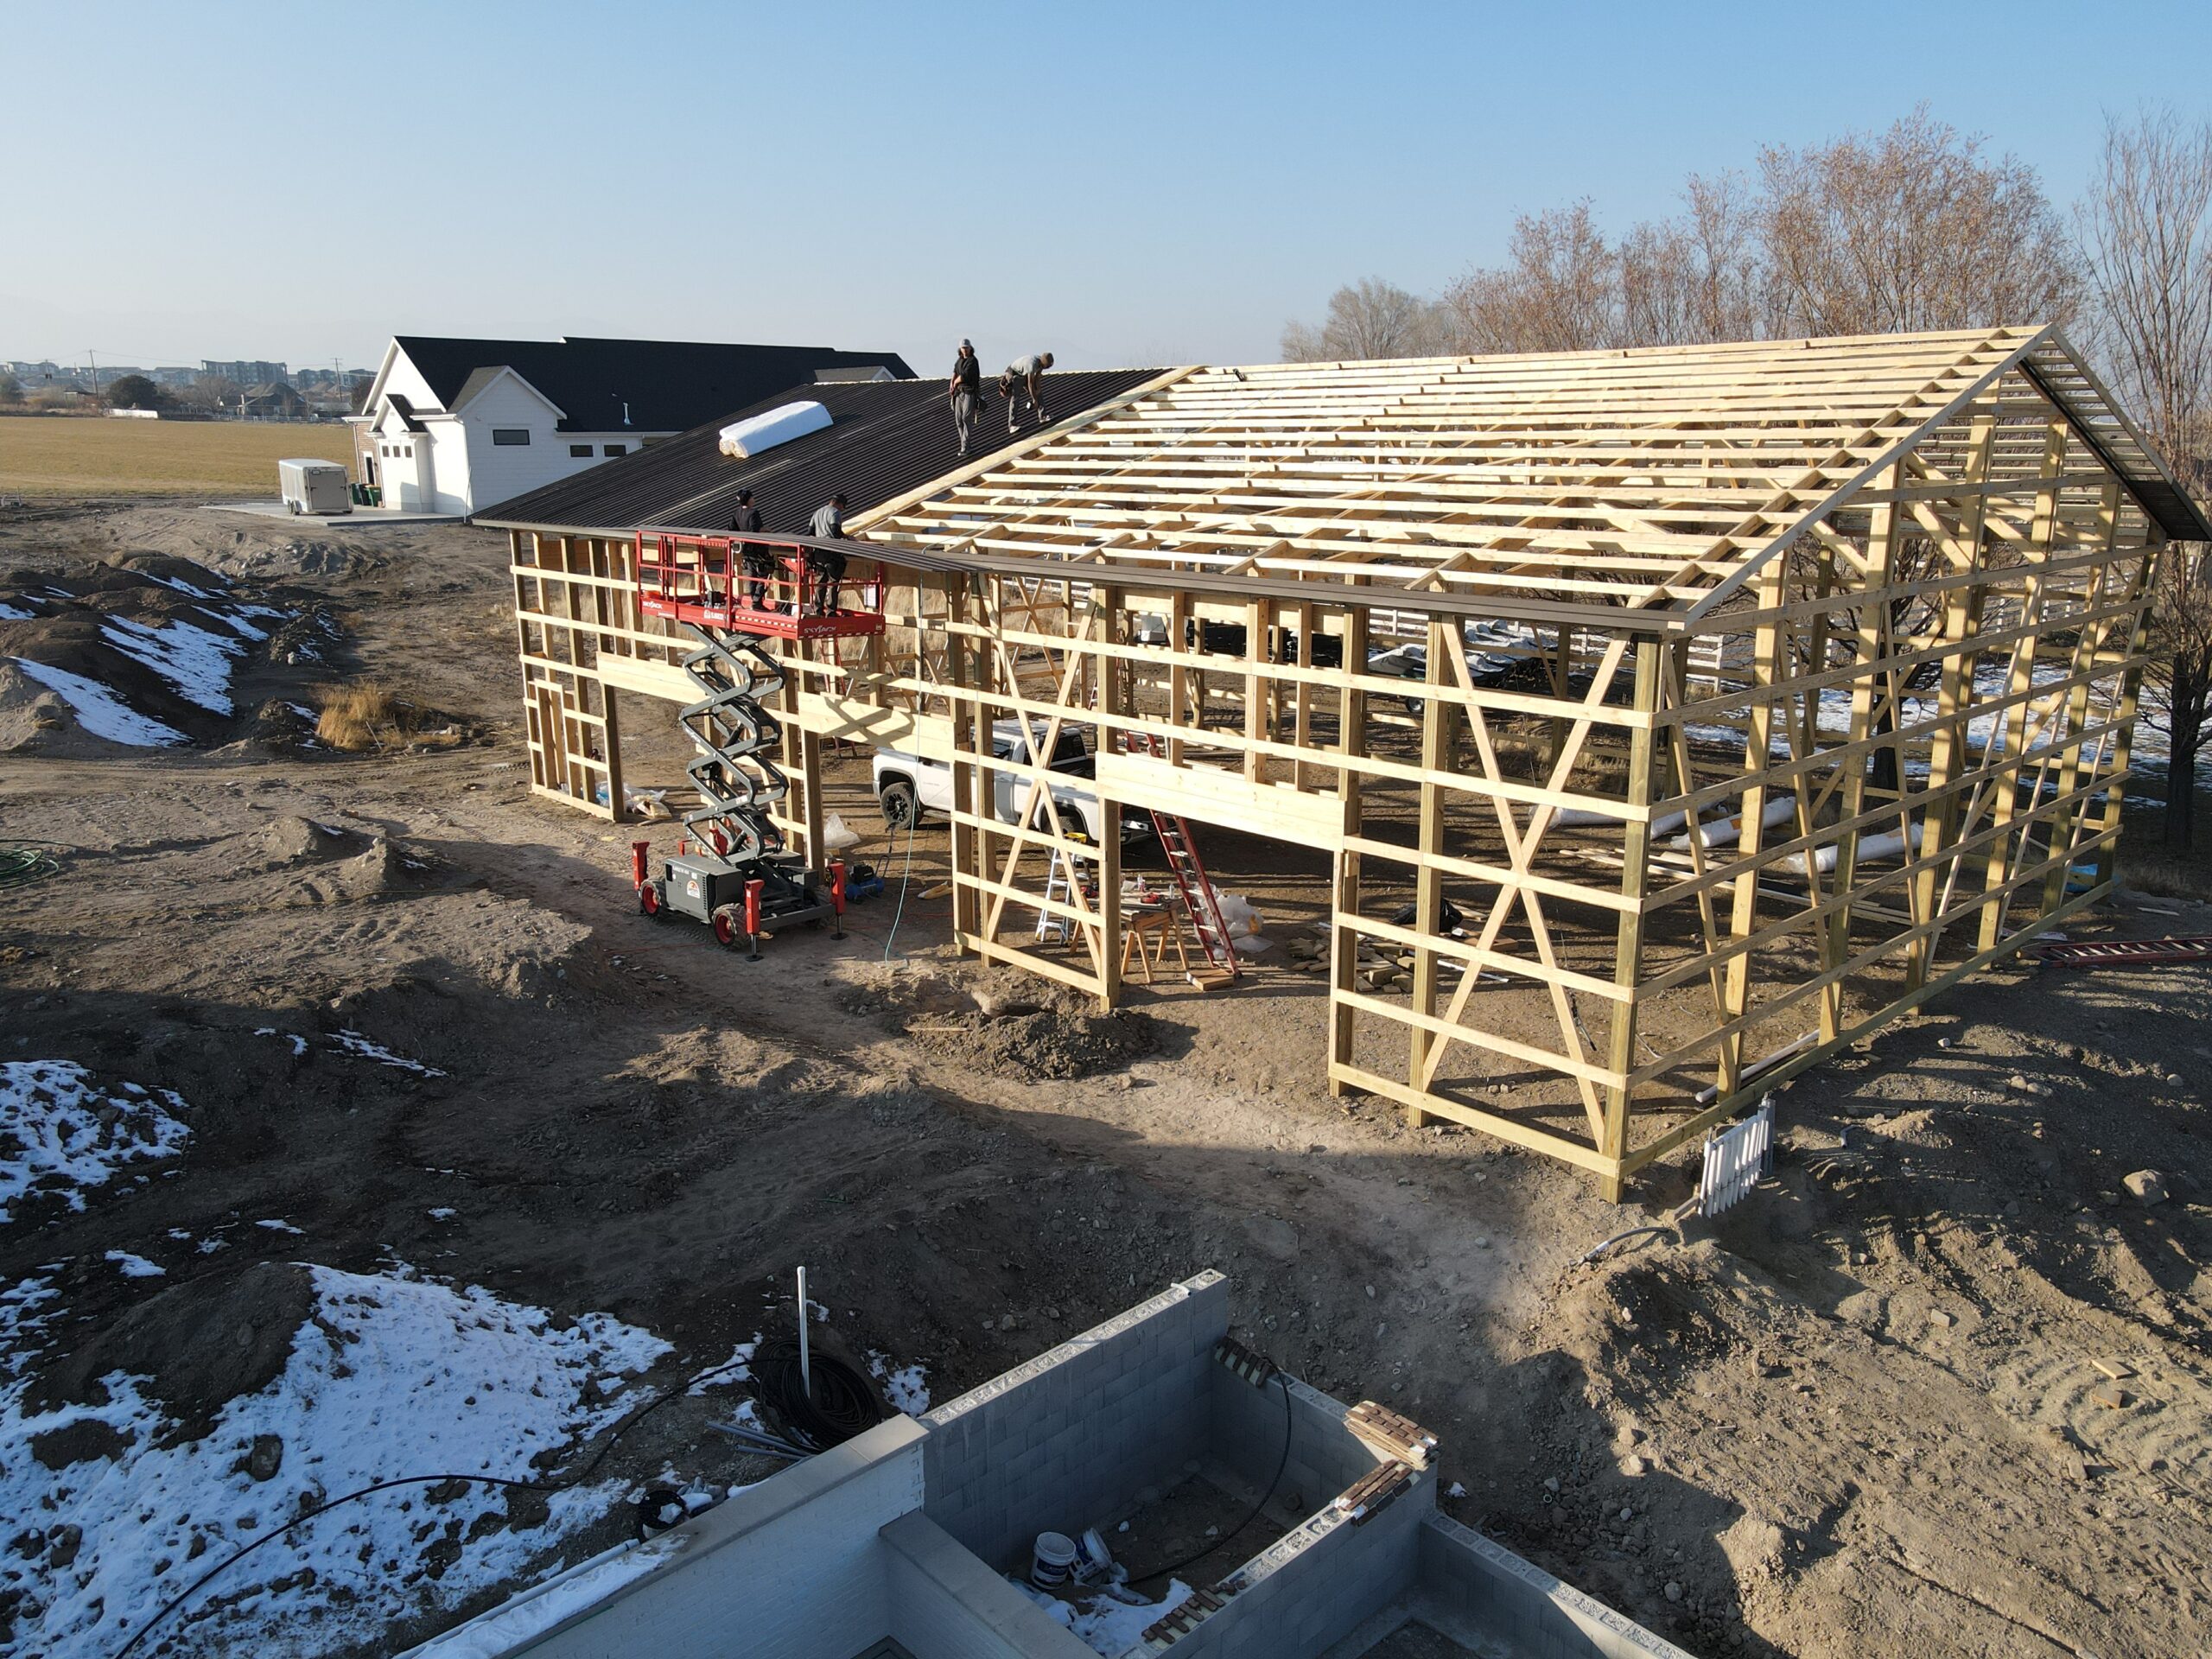
A pole barn is different from a traditional home build. Instead of a full foundation and framed walls, the structure is supported by posts that are set directly into the ground. The walls and roof are built off those posts. The result is a building that gives you square footage and height without the cost of full residential construction. You still choose your doors, windows, insulation, and finishing, but the base structure is much more affordable. For us, that made the project possible.
Choosing the Size
We wanted the barn to be large enough to shoot, practice, and play full movement basketball without feeling cramped. After taping off layouts in the yard and testing out different lengths and widths, we chose to build a 48 foot by 80 foot structure. It is slightly smaller than a traditional high school gym, but large enough to comfortably play.
One detail that is worth noting is that the structure’s support posts sit inside the building. Each post takes up about 7½ inches of interior space. When you factor that in along the walls, you lose about 15 inches of interior play space in both directions. If we were building again, I would add a few extra feet in width to account for this. Even two to four additional feet would make a noticeable difference around the three point line.
Comparing Builders and Choosing a Company
We requested bids from several companies in Utah and Wyoming and gathered four or five quotes. When we compared the same building size and materials, most of the bids were within about $20,000 of each other.
We chose Cleary Building. We had friends who had barns built by them and had positive experiences. Additionally, they had glass garage doors left over from another project that we were able to purchase at a discount. Those doors were a style we wanted. They let in a significant amount of natural light and visually opened up the interior space.
Overall, Cleary did a good job communicating with us during the design process, permits, and building, but we felt like they ghosted us after when we had some issues with our garage doors not being tuned and adjusted correctly, and one of the tracks didn’t function the way we needed it to for a basketball court, and the trim around the garage doors wasn’t installed well and after just 2 months started to fall off and we had to reinforce it ourselves and had to call a 3rd party technician to come and fix the other issues because Cleary never got back to us.
Pricing & Bids
One thing to be prepared for is that pole barn bids are not itemized. You will not receive a breakdown showing how much individual additions change the cost. Instead, you describe the size and features you want, the company gives you a price, and if needed, you revise and repeat until the project fits the budget. Expect some back and forth during this stage.
OUR COST IN SUMMER 2024: Our Barn, 48x80x17 including 3 manual glass garage doors, 1 16′ garage door with opener, 2 man doors, 4 windows cost $150,000, which was our max budget for this portion of the project. Keep in mind, without the garage doors the cost would be significantly less, and if the glass garage doors weren’t left over, the overall cost would have been higher.
Week by week costs fluctuate based on building materials, time of year, labor and region.
Building The Pole Barn
The barn company handled the structure from start to finish, including setting the posts, framing, wrapping the building in weather resistant material, adding insulation, and installing the exterior metal sheeting. They also offered interior finishing options, such as metal paneling or drywall, but we chose to stop at insulation to stay within budget. This left us with a clean, insulated shell ready to be finished on the inside.


Doors, Windows, and Light
We installed four garage doors total, three of them glass to bring in natural light and one standard large door for practical access and future flexibility. We also included four windows and two standard exterior doors.

Because we knew we would eventually install a hardwood court floor on top of the concrete slab, the doors were intentionally raised six and a half inches above the ground level. This allowed space for both the concrete slab and the wood floor to be added without creating threshold issues. Installing the doors at the correct height early made the flooring installation much easier later.

Concrete, Plumbing, and Utilities
Since pole barns do not come with flooring, we hired a concrete crew to pour the slab separately. The concrete cost approximately $32,000 for 4,000 square feet.
Before concrete was poured, we planned the plumbing layout for a sink, toilet, and drinking fountain. Because both the house and the barn were being built at the same time, we were able to tie the barn plumbing into the house sewer line. This cost around $5,000. If we had needed to tap into the sewer at the street, the cost would likely have been between $20,000 and $40,000. The timing saved us a significant amount.
We also ran electrical and gas lines from the house to the barn during this stage. Planning these services early prevents having to trench and retrofit later.


Ceiling Height and Lighting
The walls in the barn are 17 feet tall and the trusses sit at about 20 feet. This has been enough clearance to play without hitting the ceiling. For lighting, we consulted my brother in law who works in commercial lighting design and installed bright, gym appropriate fixtures. You are aiming for 50 foot candles for a basketball court (I don’t exactly know what that means, but you can tell a professional and I’m sure they’d understand). The result is a well lit space that feels bright in winter and during evening play.

What Comes Next
This post covers everything about the barn structure itself. The next part of the project was installing the basketball court flooring, which included sourcing reclaimed maple gym floor panels, joining and leveling the panels, sanding, sealing, and painting court lines. That process involves enough detail to deserve its own explanation, so the next blog post will cover the court floor installation step by step. You can read that HERE.

Other Blog Posts You May Like:
Behind the Build: Excavation,Soil & Timeline
Exterior Brick: Breathable Brick Paint
Creative Mines – Brick & Stone


+ show Comments
- Hide Comments
add a comment