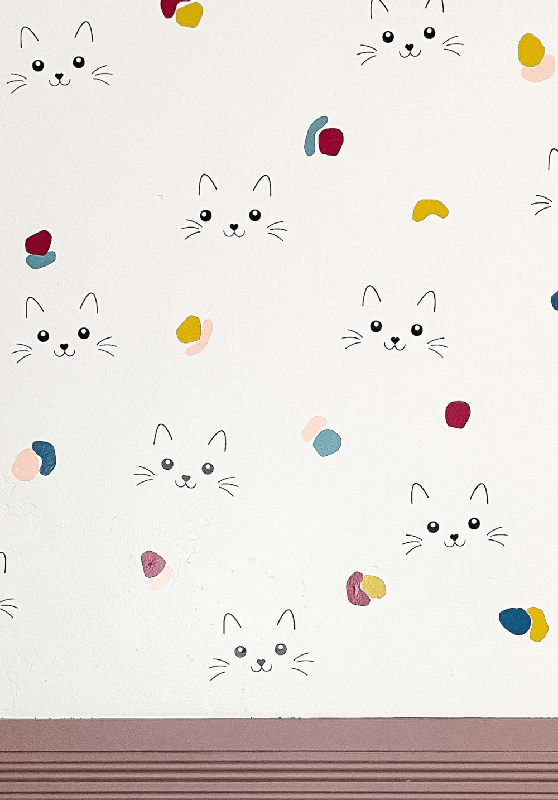
Ever wanted a custom wall design but didn’t want to commit to expensive wallpaper, and too detail oriented to use a stencil and live with hand painted imperfections? Well, I think I found the perfect in between solution to a custom wallpaper look for under $50 using removable vinyl and my Cricut Explore Air 2. Here’s how you can turn any purchased SVG image into your own personal custom cat wall decals using vinyl. For the full behind the scenes of the project click here. Be sure to PIN this project for later!
Bottom of this blog post are sources to the entire bedroom.

SOURCES
Here’s my project link for the cat spots: Rainbow Cat Spots
Cute Kitty SVG
Cheetah/Leopard Wall Decals

Find your SVG Image
Etsy is my go to source for finding and purchasing inexpensive custom SVG files. They range from $1-3 and are digital downloads. Bwloe you will find the link to the cat wall decals I used. The best part of uploading an SVG into Cricut Design instead of a regular jpg or png is in the SVG file each individual shape is its own “cut” so you can omit different parts of the file if you don’t want them. For example, on the cute kitty I wanted it all to be the same color and I didn’t want the blush cheeks so I turned off the eyeball function and the cheeks didn’t cut.


Once I purchased my SVG file from Etsy, it sends a link with a digital download. Now it’s time to upload the SVG file into Cricut Design Studio. Here you can customize size, color, features, and the number of cuts. Insert your vinyl into the machine, click cut, and bam! Now you have 6 cat wall decals.
With an SVG file, be sure to highlight over each face and click “attach” so it cuts the pieces with the correct spacing.


Cricut Cutting Tips
For my vinyl I always go up ONE dial click on my Cricut machine to make sure the pressure is enough to get out the fine details like the whiskers.
For this wall I ended up cutting and transferring 90 cats. It was a 2 afternoon kind of project, not hard, but time consuming. Total I used 4 rolls of black vinyl with each cat face measuring 4″ in width. For the rainbow spots I created my own cutable shape and printed as many spots onto one 12″x12″ sheet of vinyl as I could. I repeated this step for 5 different color sheets of vinyl, then stuck them on the wall at random to mix up the shape and colors. One bean shape with one circle shape.

Rainbow Cat Bedroom Sources:

Faux Olive Tree
Beddys Full size Rainbow Luxe Bedding use code: HONEYBUILTHOME for 20% off
Decorative Pillows use code: HONEYBUILTHOME for 20% off
Emma-Mattress use code HONEYBUILT10 for 10% off thru June 7
Sherpa Blanket
Cat Stuffed Animal
Nightstand (similar)
Rainbow Ceramic Decor
Florals on nightstand (Michaels Summer Decor)
Faux Plant
Floating Shelf Tutorial
Mirror (Similar)
Woven Chandelier
Table Lamp
Coral End of Bed Storage Bench
IKEA Brimnes Bed Full Size
Sherpa Chair
Favorite Paint Sprayer
Brad Nail Gun
Wood Hanger Rainbow Hook
For more behind the scenes of all projects be sure to follow along in IG stories: @HONEYBUILTHOME
If you are looking to get into DIY But don’t quite know where to start or how to use tools check out my online course, DIY Beginner Basics and use code: HONEYBUILT10 for 10% off!


+ show Comments
- Hide Comments
add a comment