So you want to jump on the trend of the budget friendly stencil instead of blowing your entire savings on wallpaper, but your fear is that it’s going to look… like a child did it. Am I right? Well let me give you some surefire tips to help make your stencil experience not only more enjoyable, but also produce a crisp clean pattern that will have EVERYONE doubting that its painted on! Lets do this!!
First, the star constellation stencil was NOT my first rodeo. I learned a TON from stenciling my daughters BOHO wall. Click here for that project. So let me save YOU the headache and jump to the good stuff.
1. Invest in a quality stencil
You can find stencils all over the internet from different vendors and the prices will range from $10-50… and so do the size. Most of the $10-25 stencils are small.. I’m talking like the size of a piece of computer paper, or smaller. If you are trying to tackle an entire wall…. you are going to be SO frustrated with a little stencil. I purchase my stencils from Cutting Edge Stencil. They are 20″x28″… and have a repeating image in each corner so its easy to line up your next piece. Their stencils are also thick, but flexible.
2. Use a spray adhesive
This is controversial, but I promise for a novice stenciler on textured walls.. this is a must! I use temporary spray adhesive onto my walls, yes, I said it, on my walls.. then apply the stencil. This helps SO MUCH with bleed through and making sure the stencil is really STUCK on there. It does leave a mild tackiness on your wall.. but once the paint is all dry (a few hours later or the next day), take a baby wipe to the wall and the tackiness will come off, and your crisp pattern will stay.
3. First project? Stick with a random pattern vs. a linear pattern stencil
Cutting Edge Stencil has hundreds of stencil options some are linear like chevron lines, or subway tiles… these have to CONSTANTLY be checked to make sure things are straight and level.. and a lot of the times walls or floors or wherever you are stenciling… isn’t straight.. and isn’t level. So stick with a more fluid or random pattern and you are sure to find success.

4. Little paint. Lots of blotting.
The BIGGEST issue I see in stenciling is loading up your brush with too much paint. First, use a flat brush that is meant for stenciling. Dab the brush onto the LID or a plate where only the first 1/8″ of the bristles actually get any paint on them.. immediately dab the brush on a clean paper towel to get rid of some paint before applying it to your wall. Its going to first feel like you aren’t even applying paint, but I promise this is the BEST way to stencil. Also go in a dabbing motion on the wall. No swiping, no circling. just dab dab dab.
5. Think outside the box
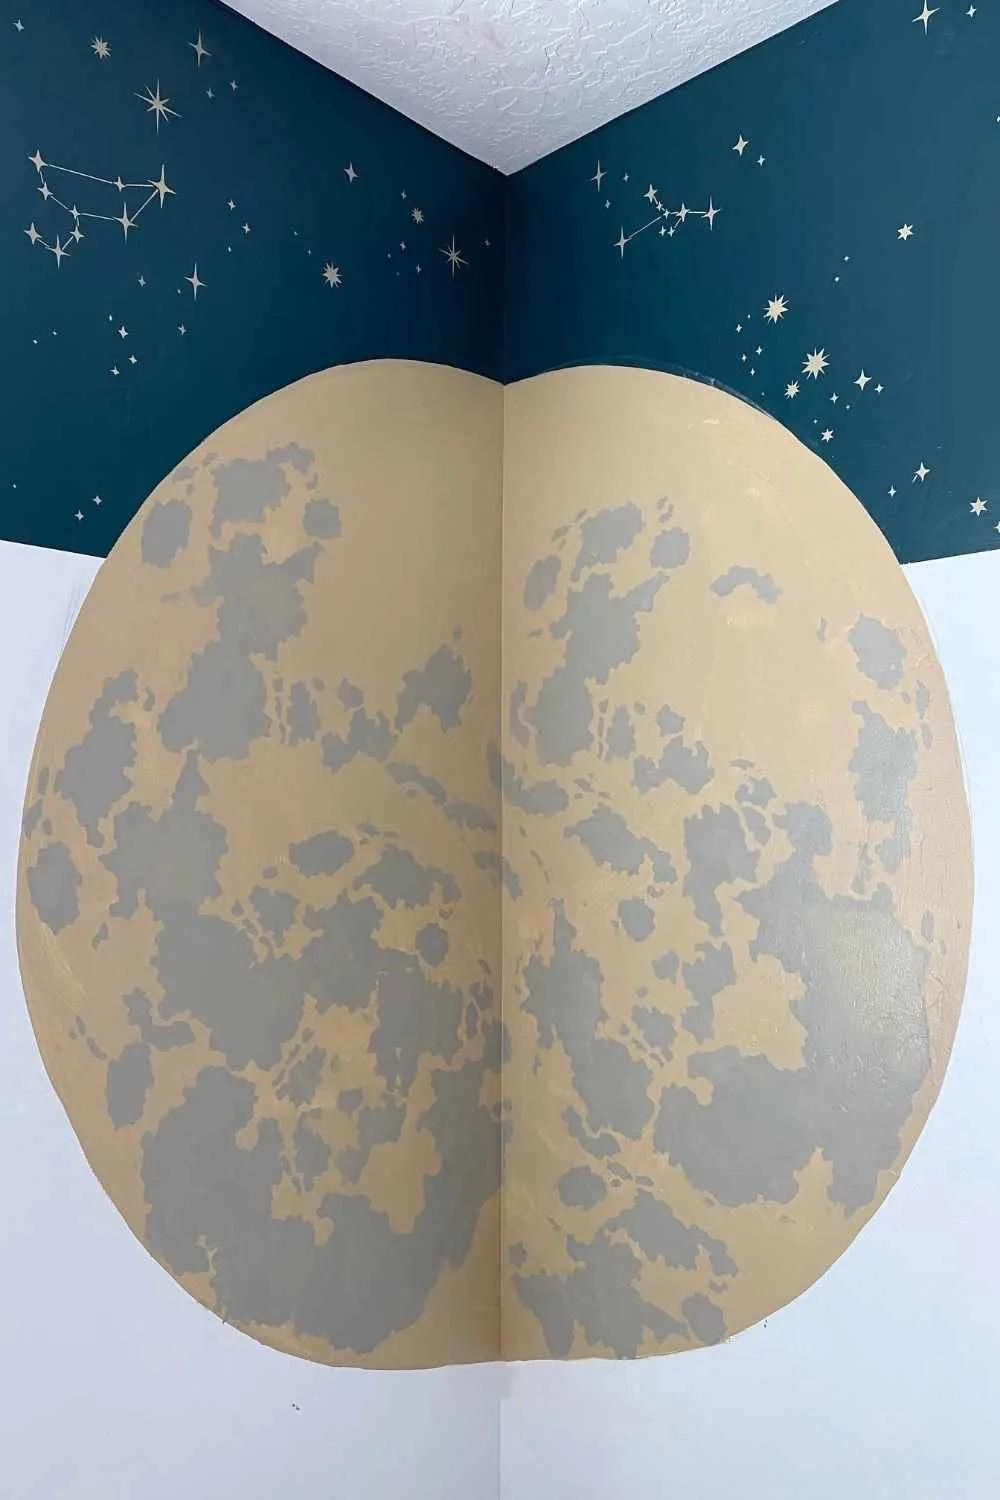
Stencil projects allow for creativity! Don’t be afraid to use multiple colors on one stencil… and don’t be afraid to GO BIG and use the stencil like I did with this moon… You will get super unique and amazing finishes if you let yourself get creative.
How to recreate the large moon
First take a tack and push it into the center of where your circle is going to be. Take a string tied to a pencil and draw a large circle. Color in the circle with SW 6121 Whole Wheat so it is a solid gold circle.
Next take the largest moon stencil by Cutting Edge Stencils and apply it to the wall (with adhesive sprayed onto the wall first). Dab SW 6172 Chatroom onto portions of the moon. Be as free and creative with this as possible to achieve the base of the moon.

While everything is still wet mix some black acrylic paint (the kind you find at Michaels for $1), into the SW 6172 Chatroom and go back with the stencil and darken up some of the edges the moon. Once you have the dark and the light grey applied here’s where the magic happens… take some acrylic glow in the dark paint on your brush (same brush.. never washed it) and apply the glow in the dark over both the dark and the light grey areas to blend the two together and create some cloudiness. wah-lah! Star Stencil with moon is complete!

Room Colors:
Dark wall color: SW 6223 Still Water
Stars: SW 6121 Whole Wheat
Moon base: SW 6121 Whole wheat
Moon shadow: SW 6172 Chatroom
For more fun tutorials and behind the scenes of projects be sure to follow along on instagram!! @honeybuilthome
xo- Christine

+ show Comments
- Hide Comments
add a comment