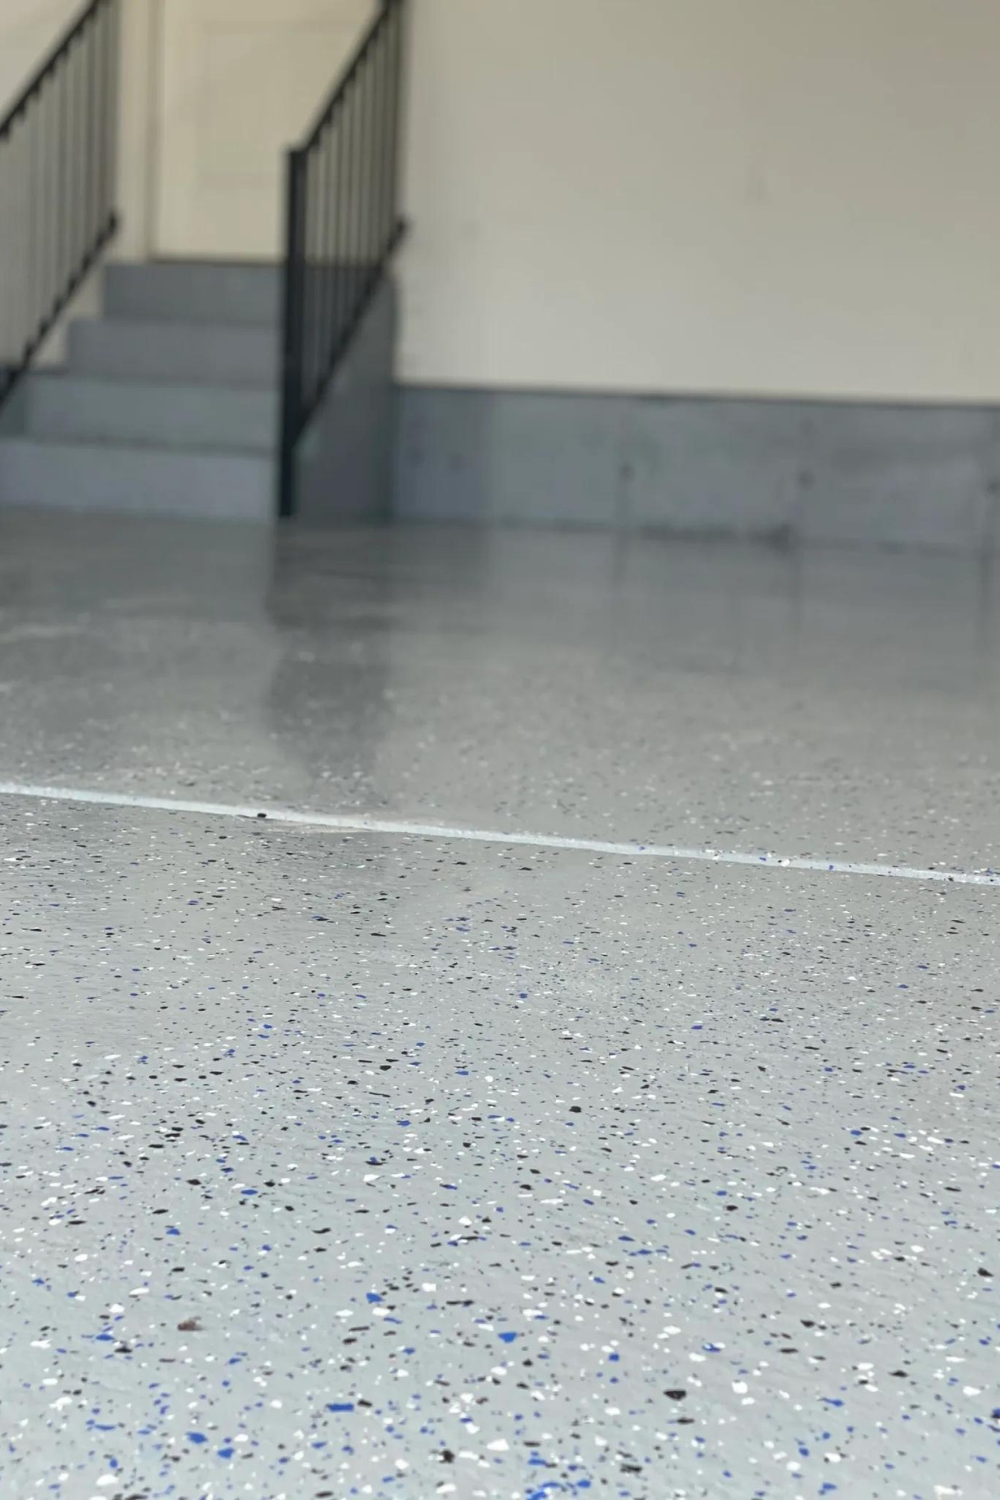


Want to transform your own dated, dingy, and gross garage floors into a durable, shiny, and show worthy space? Well you CAN do it yourself and have it look like professionals did it! So here’s what you need.
Prep
Prep is the MOST important part of this entire project. You need to CLEAN your existing concrete extremely well. Pressure washing will remove a good majority of the debris and spills, but pressure washing alone might not be enough if your floors are in rough shape. You’ll want to also use a concrete cleaning solution.
And possibly a paint stripping agent to get down to the bare concrete. Fill any cracks or holes with this concrete patch.

The instructions on the packaging pretty self explanatory. You will want to have safety protection on: glasses, rubber gloves, rubber boots. The etching solution is very acidic and will burn if it comes in contact with skin. If you have previously epoxied concrete or painted concrete use the stripper and a scraping tool to remove it first. Another option that is labor intensive but very effective is grinding down the concrete. You can use a hand angle grinder or you can rent a large grinding machine.
The etching is the final step of your cleaning process. You will want to wash the concrete 2 and maybe 3 full times to make sure there isn’t any bubbling solution forming on the floors. If you see bubbles when you spray it off.. it isn’t clean enough. Continue to spray and squeegee until things are bubble free, then let it dry for AT LEAST 24 hours. Ideally longer to make sure no moisture gets trapped under the epoxy.
Epoxy
Things are dry and you are ready to start laying down the epoxy! Think of this step like painting… but epoxy is a lot more liquidy and thin than regular wall paint so it can get messy! Use a 5 gallon bucket to pour your epoxy and a 9″ roller with an extension pole. If you plan to apply it on your sidewalls start there, and cut in on the cracks, then roll with the roller. Once the epoxy is mixed you only have 1-2 hours (depending on the temperature) to completely coat the floors. Time is of the essence, that being said, work diligently to create a nice even coat.
Coat a 10×10′ section, then sprinkle in the paint chips (these come in the epoxy kit). The chips are meant for esthetics, but also help disguise dirt on the floors and they are SUPER fun to spread! If you get some chips on the bare concrete take a leaf blower and blow them away before moving onto the next section of epoxy. Be careful to not epoxy to big of a section that your throwing reach can’t get paint chips to an area!
LET THIS DRY, 12 hour before light traffic, 24-36 hours before moderate traffic, 3 days before parking a car.
Clear Coat
The clear coat is optional, but it really does increase the durability of the epoxy plus it gives it that showroom look which is so cool. You do have to wait at least 24 hours after the epoxy application for the clear coat, but no longer than 5 days! The application process is almost identical to the epoxy. Inside the kit comes an anti-skid additive which adds some grit to the floors so when wet so no broken hips!

Be sure to check every few minutes to make sure you aren’t missing a spot. You do so by basically laying on the ground and looking at the shine. #notkidding
Now let that dry for the same time windows, 12 hour before light traffic, 24-36 hours before moderate traffic, 3 days before parking a car and thats it! You now have gorgeous garage floors!
Total Project Cost: (for my 3 1/2 car garage)
Cleaning Prep & Supplies: $77
Epoxy: $234
Clear Coat: $324
Total Cost: $635
Click the Image below to shop!

Be sure to follow along on instagram @honeybuilthome for more projects and if you want to learn HOW to DIY be sure to check out DIY Beginner Basics, and use code HONEYBUILT10 for 10% off!


+ show Comments
- Hide Comments
add a comment