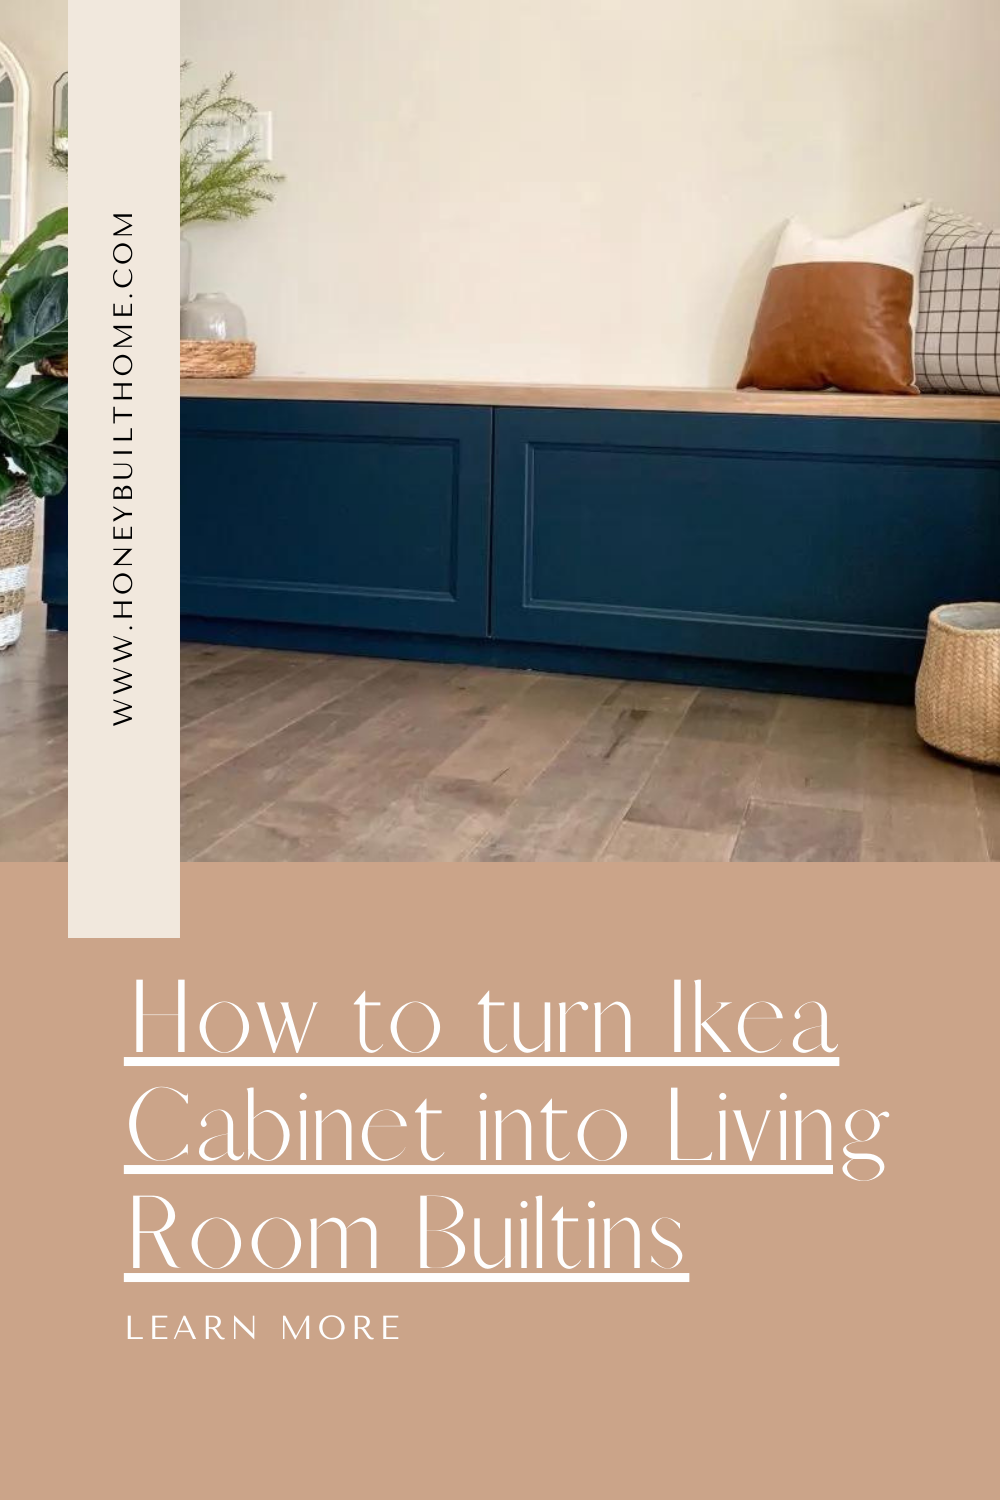


Moving into our home one of the first things we put on the project list was to do some builtins on either side of the fireplace. It’s been a project we’ve talked about numerous times and our plans have evolved and when the right solution came to the forefront of our mind it just clicked and I committed and here we are, the full tutorial on how to turn Ikea kitchen cabinets into an Ikea cabinet builtin bench of drawers.
These builtins also feature faux white oak floating shelves, and a DIY brick fireplace install. Be sure to check both project tutorials out!


Why builtin benches instead of builtin cabinets?
For us, we have a lot of cabinetry throughout our home and a lot of storage solutions. For us, we loved the idea of having some storage hidden away, but also loved the multipurpose of doing a benches as seating for large gatherings. You could pull up a table and turn it into a banquet. My kids have already used it as a stage for their “performances.” Lastly, cost was a huge factor in doing benches as opposed to cabinets.
Ikea cabinetry was going to cost $1200+ and the door sizes would vary because the space I was working with was 85″. I got a bid from a custom cabinet builder which was going to be $2000 for cabinet boxes and doors (without a top) so an ikea cabinet builtin bench was the most cost effective solution.
Researching thoroughly through Ikea’s selection of cabinet boxes and doors I came up with a few different layouts that would work in the space. When your are mapping out a space for builtins take your measurements, length and width and the cabinets need to add up to these measurements, ideally less by a few inches, so you can add trim and filler pieces to make it more of a custom, builtin.
Shopping List:
AXSTAD Door x4 $91
SEKTION Wall Cabinet Box x4 $40
KOMPLEMENT Drawer x4 $30
Total Ikea Cost=$644
Ikea does make Section Drawers known as Maximera and Forvara, but neither one of these drawer boxes comes in a 40″ size, so I opted to use the Komplement system (which is meant for an Ikea closet), and it worked fabulously.
Building the Support Frame
Assemble a frame out of 2×3’s (2×4’s would also work great). Cut 2 boards to length and several support pieces to create a rectangle with added support in the middle like shown. Assemble boards together with 3″ construction wood screws.

Place the support frame on the floor where your cabinets will sit. I positioned my cabinets in the center with 2.5″ on each side, just enough for a 1×3″ piece of trim to fit snugly and give it the builtin custom feel.
I drilled a hole in the back panel of the cabinet box so I could still access my electrical outlets. This was done with a 1″ drill bit and a jig saw cut in the shape of a rectangle. I drilled another 1″ hole through the sides of the two cabinets to feed my HDMI cords so one box could hold all of my components (DVD player, cable box).
After dry fitting the cabinets where I wanted them I attached the base support frame directly into the wall studs. This prevented me from damaging my floors and made sure this unit was going to go anywhere.
Once the base was secure I attached the cabinet to the base frame using 2″ construction screws from inside the cabinet down into the 2×3 frame.
Next I attached those two filler pieces with finishing nails to the sides of the cabinet like shown.
Lastly trim out the bottom 2×3 with a piece of trim the length of the entire unit. Thats it! Ikea cabinet builtin bench!


Assembling and attaching the drawer box
Like I mentioned above, the drawer box I opted to use was from the Komplement system which meant it was not intended to fit into this kitchen cabinet. I used the sliders that came with the komplement box and attached them to the sides of my cabinet box. I then figured out my box was 1/2″ too large so to fix this I shimmed one side with some scrap wood and attached my hinge again. PERFECT fit.Completing a project like this can sometimes feel overwhelming. If you need help learning the basics of not only tools, but how to cut wood accurately, caulk, finish paint like a professional. Check out, DIY Beginner Basics, you can go at your pace with my online course that teaches you how to DIY. Head on over HERE to learn more!


The screws that come with the Komplement system are flat, so in order to attach them to the cabinet box I used a drill bit and predrilled, then used the provided flat screws.

Attaching the AXSTAD Door to Ikea cabinet builtin
The most nerve wracking part of this entire project was attaching the door to the Komplement box to turn to ikea cabinet builtin into drawer bench instead of just cabinet boxes.
- Have your Komplement box installed to the Sektion Cabinet box on a level surface.
- Predrill 2-4 screws through the Komplement box front.
- Measure the distance from the outer edge of the Sektion Cabinet to the outside of the Komplement box (example 1 1/4″)
- Measure the side of your cabinet door and make a mark at the above measured distance.
- Place the provided metal brackets (that I didn’t use for mounting the system) underneath the door to hold it up from the floor.
- Pull the Komplement box out and line it up with the marks.
- Hold steady, say a prayer and drill from the inside of the box into the cabinet with a 1″ screw at your predrilled holes.
*BE CAREFUL NOT TO DRILL THROUGH THE FRONT OF YOUR CABINET DOOR I used pocket screws because they are less likely to strip with their square heads as opposed to a Philips screw, you can also use a star construction 1″ screw. - Close the drawer and celebrate because you have just built a drawer!


The full tutorial on how the top was assembled is coming soon, in the meanwhile check out the highlight bubble where I build the Ikea bench from start to finish.
Paint: Sherwin Williams Emerald Urethane Trim Enamel
Color: Gale Force
Don’t forget to head on over to my online courses where I will teach you, and walk you through all you need to know to start DIYing.
Lastly, be sure to follow along on Instagram @honeybuilthome where I show all my tips and tricks.


+ show Comments
- Hide Comments
add a comment